Actyx Node Manager
The Actyx Node Manager is an app that lets you manage and interact with local and remote Actyx nodes through an easy-to-use graphical user interface. This document describes the main navigation elements and the features of the Actyx Node Manager.
Actyx gathers anonymous aggregate user behavior analytics when you use the Node Manager. Analytics allow us to prioritize fixes and features based on how, where, and when people use Actyx. You can opt out of sending analytics data in the preferences section of the Node Manager. Find out more in this section below.
General UX
The main navigation elements of the application are the top bar including the node search and the left panel leading to the different features of the Actyx Node Manager.
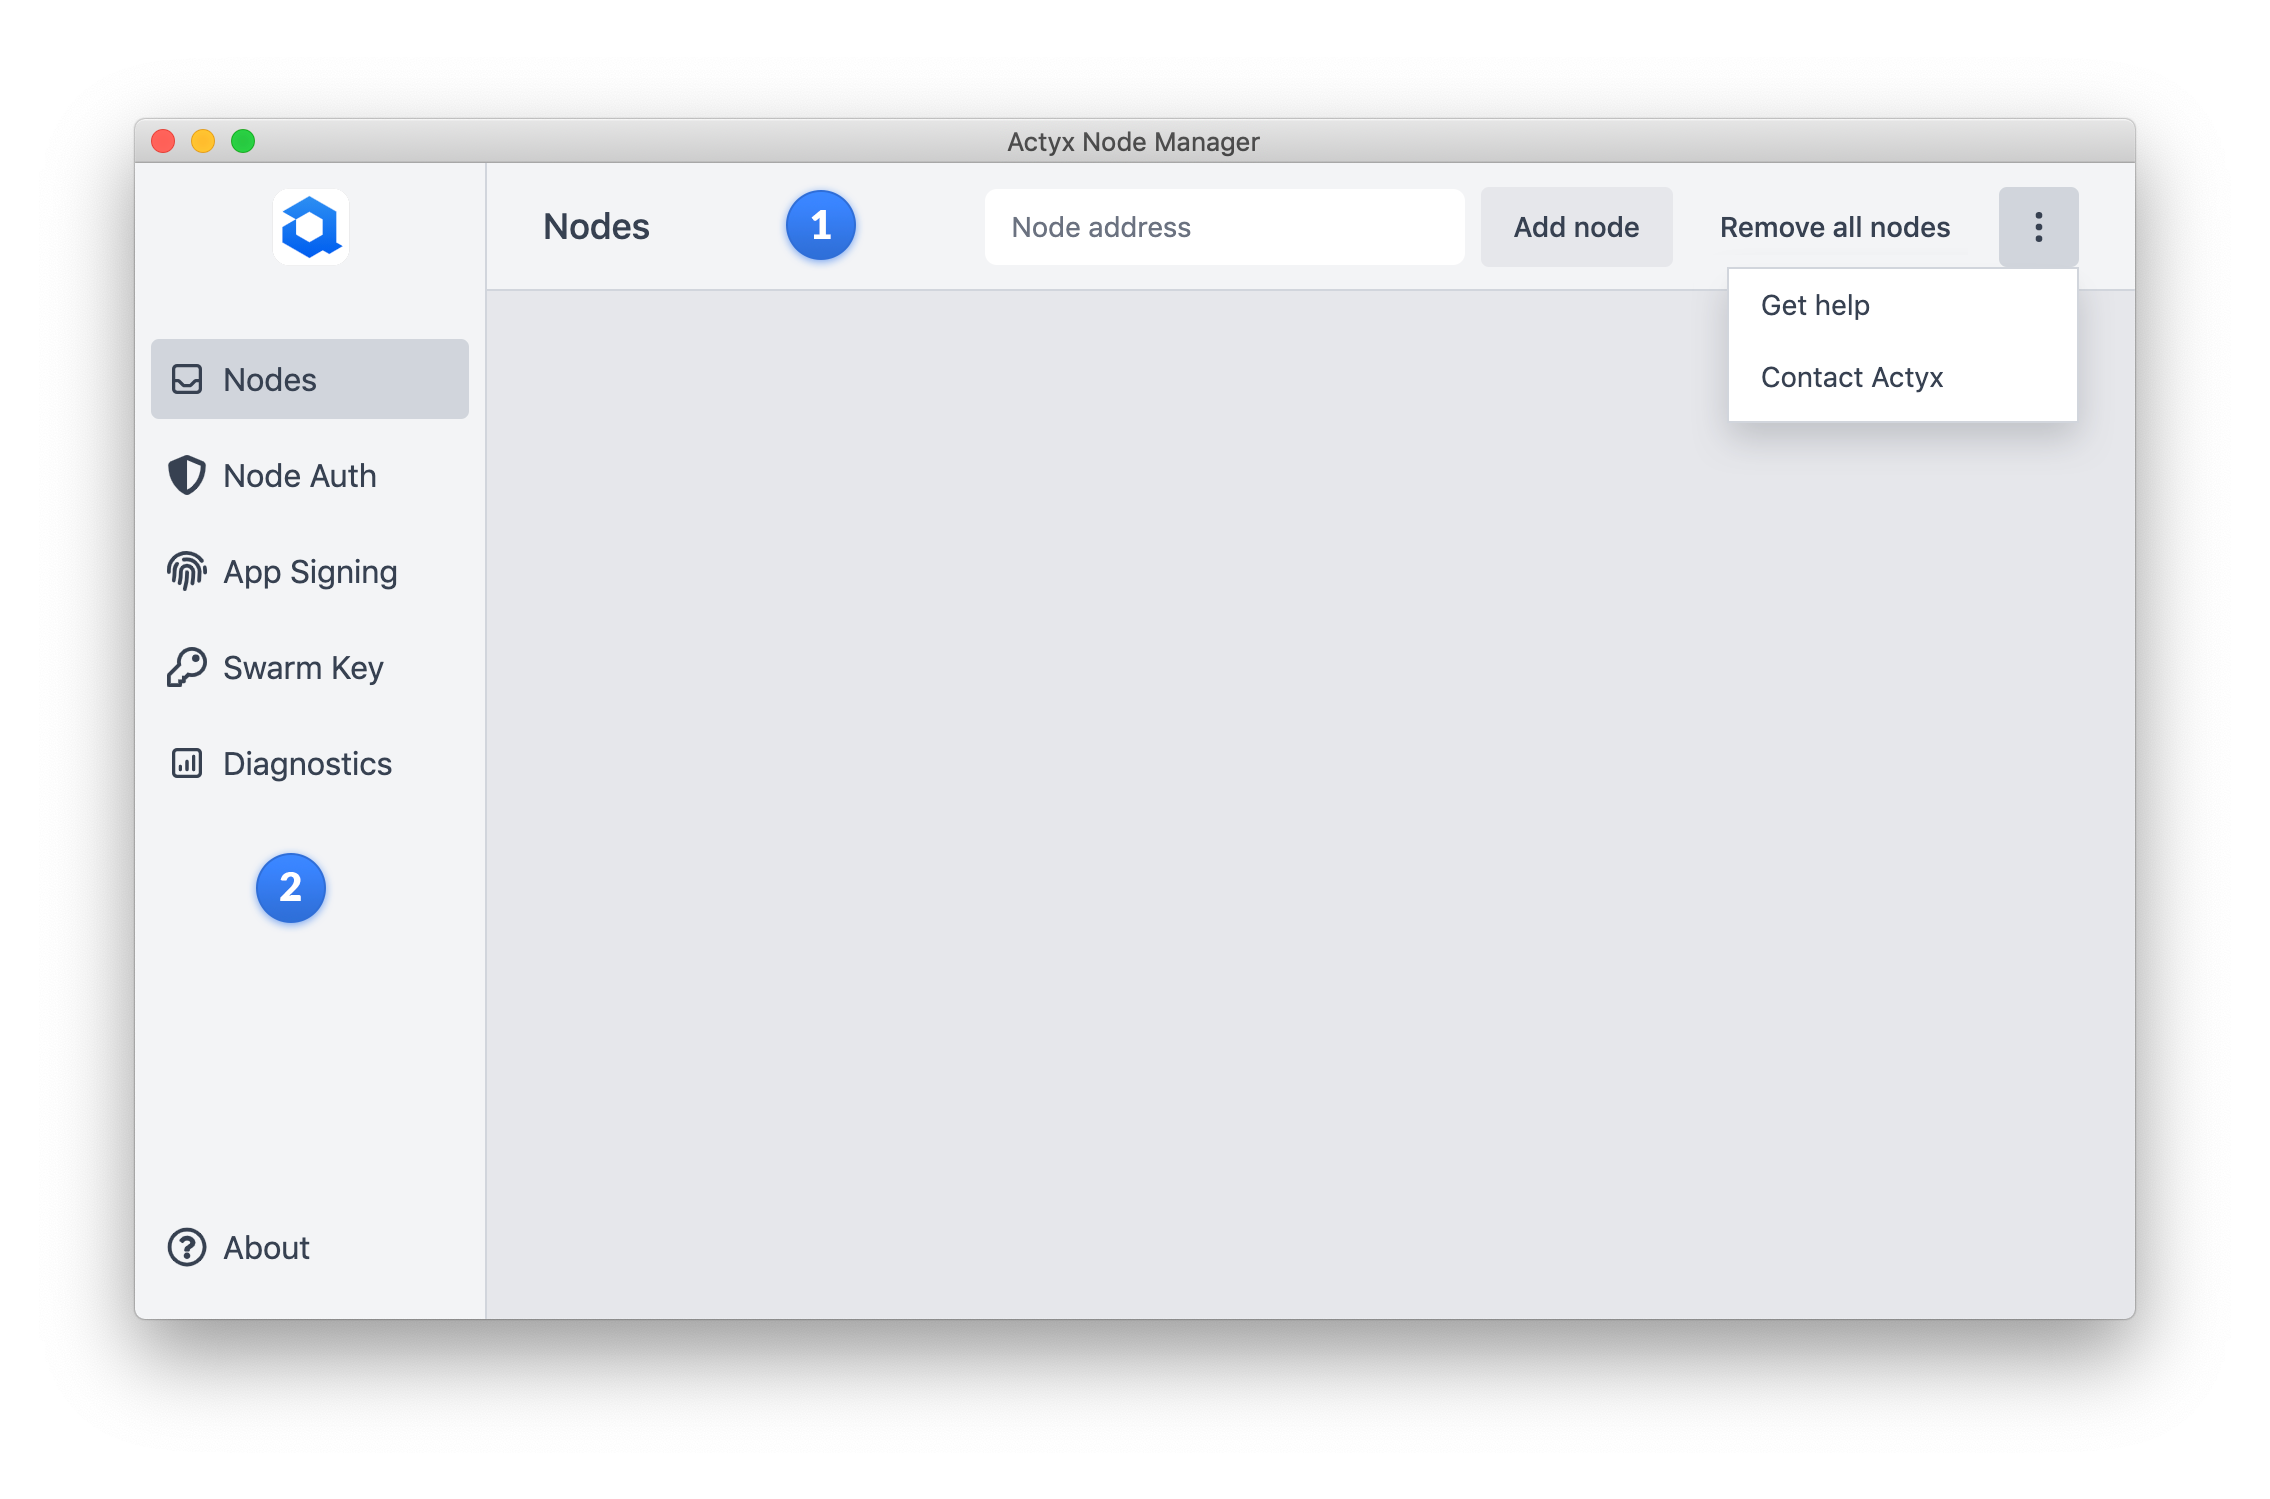
1 Top Bar
The search bar lets you connect to your nodes by entering the IP address of the node you want to connect to into the search field. Right next to the search bar, the selected nodes can be removed with the click of a button. The dot menu to the very right provides contact and help links.
2 Left Panel
The left panel is the main entry point to the node overview and all features of the Node Manager. The node overview displays all nodes that you are currently connected to and your favored nodes. The features are:
- User key generation
- App manifest signing
- Swarm key generation
- Diagnostics
Nodes Overview
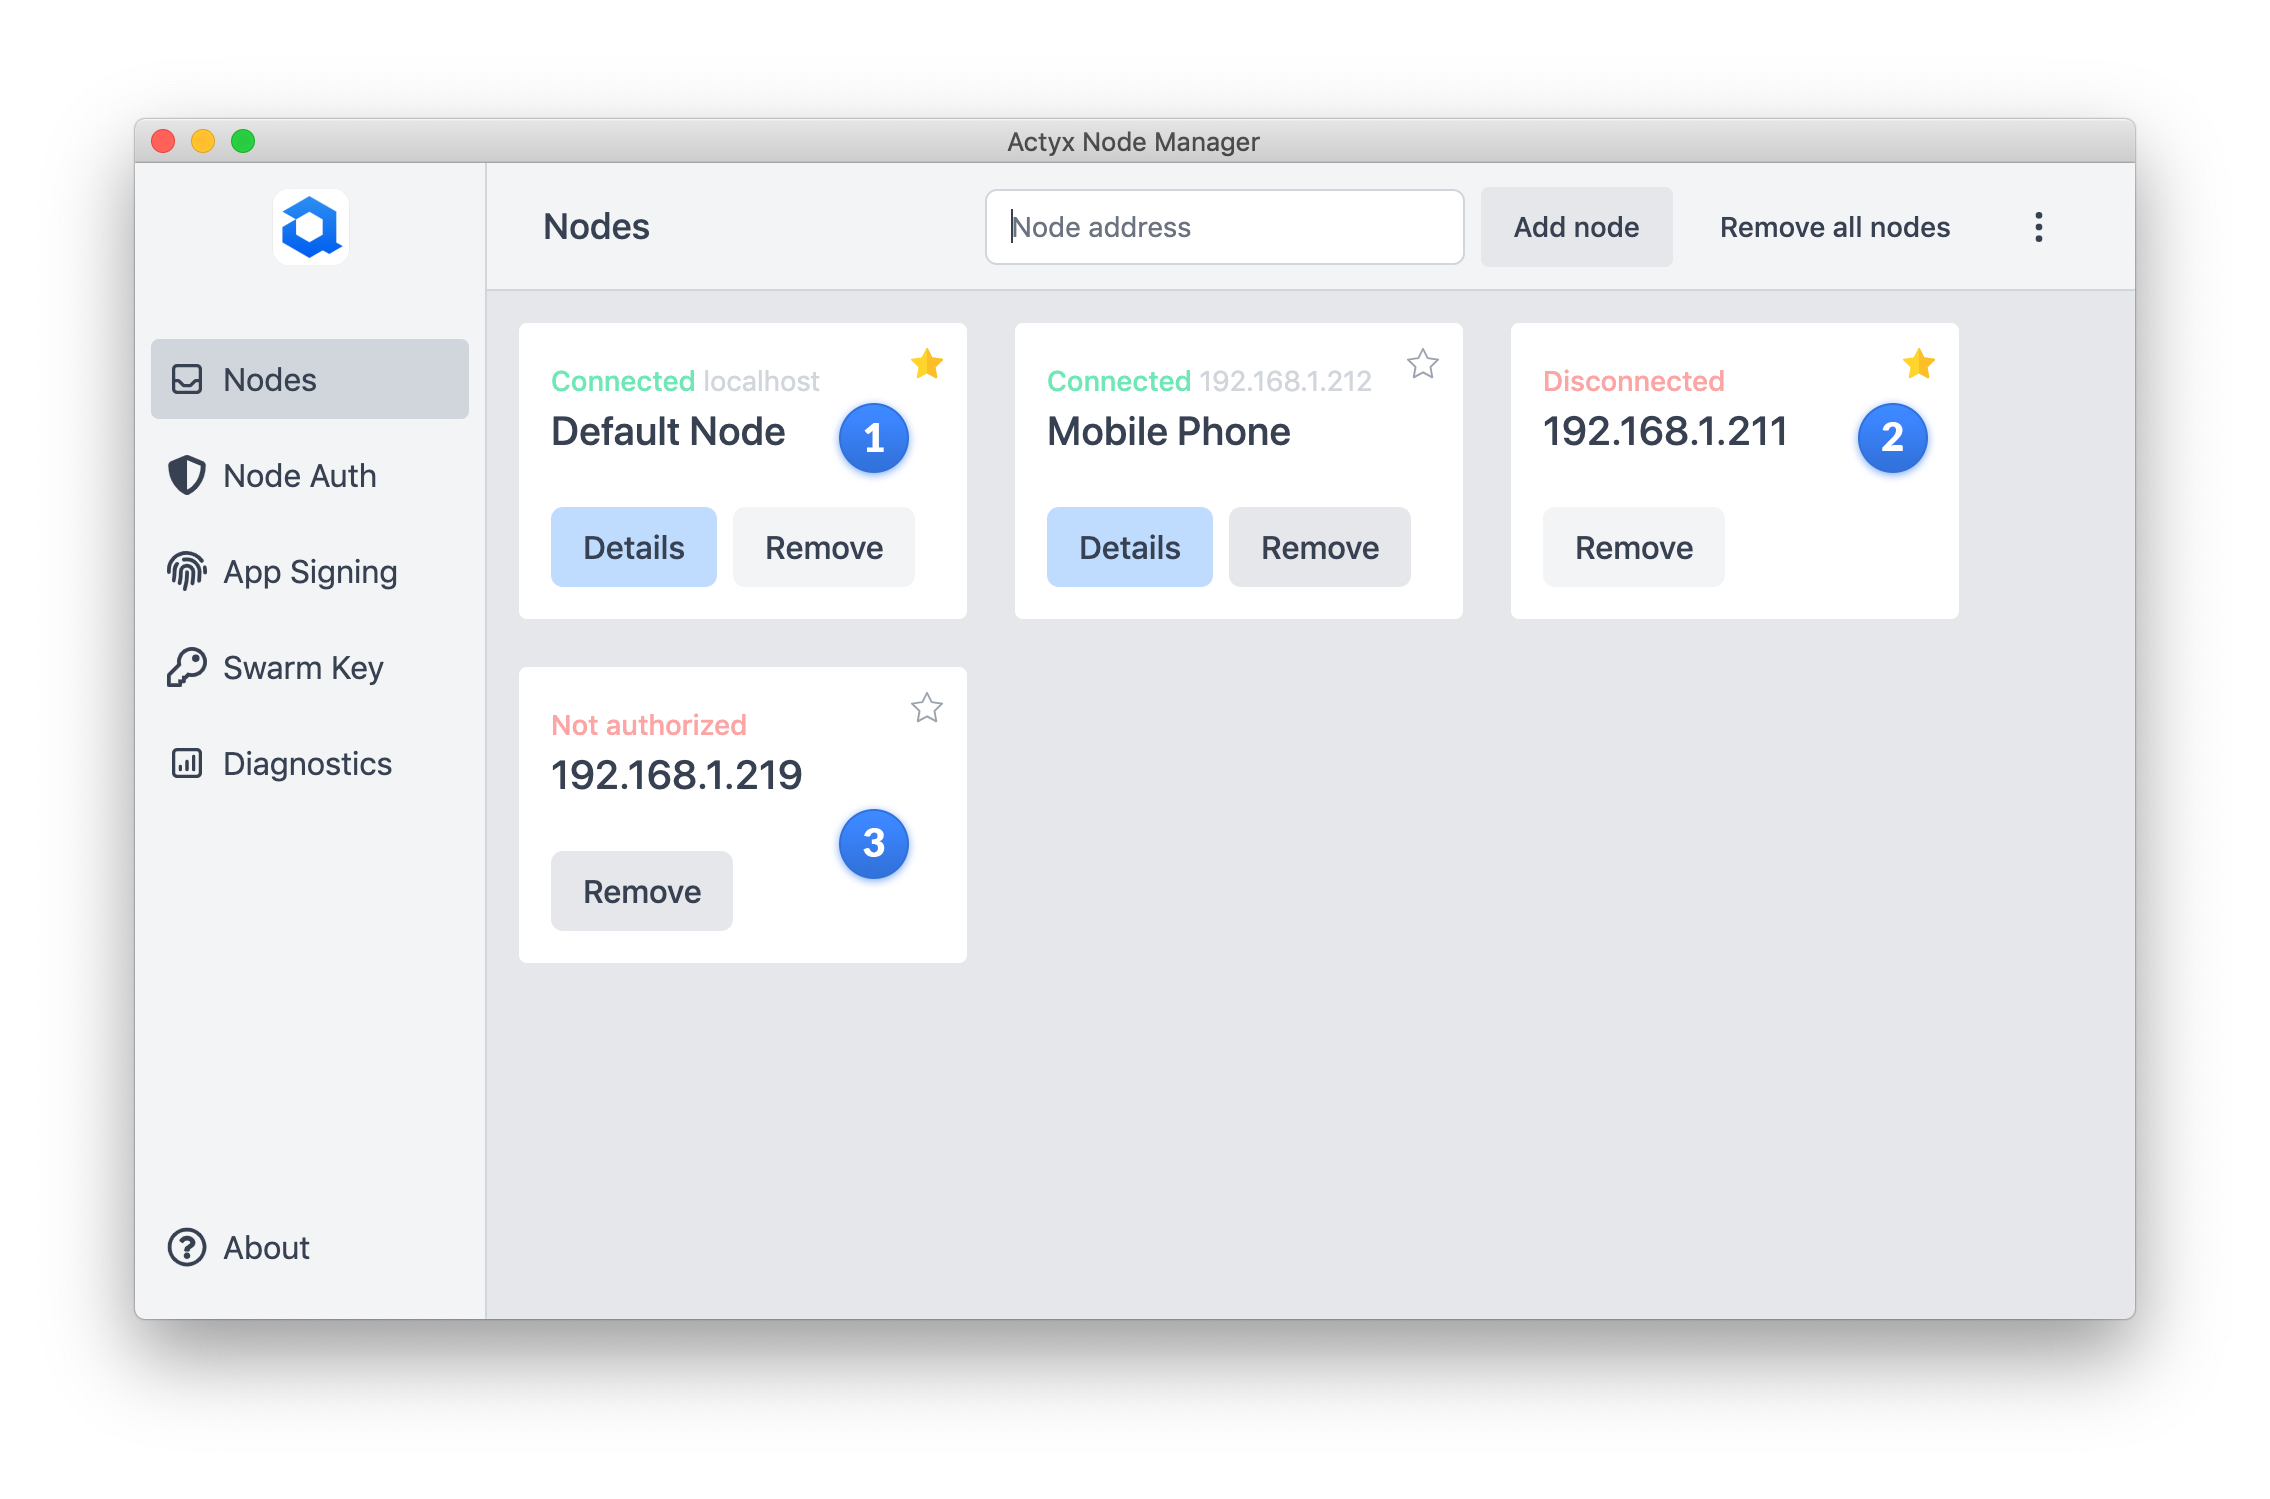
The Node Overview screen displays all nodes that were added since opening the app. You can click on the star in the upper right corner of each card to store that node’s address and open it again when the Node Manager is restarted.
1 Connected node
Upon adding a note via the search bar, it appears in Node Overview. For each node, the display name, the connection status, as well as the IP address is displayed. Additionally, you can jump into the node details, remove the node or mark the node as a favorite using the start in the top right corner.
2 Disconnected node
Once a node is marked as a favorite, it can no longer be removed and will be saved across sessions. This means that all favorite nodes are still there when you reopen the app, even if there is no connection. Once the node establishes a connection, it will be reflected in the UI.
3 Unauthorized node
If a node is displayed as Not authorized, it means that the Node Manager could establish a connection to that node but your public user key is not listed under that node's authorizedUsers.
Node Details
The Node Details view provides additional information on the selected node.
1 Info
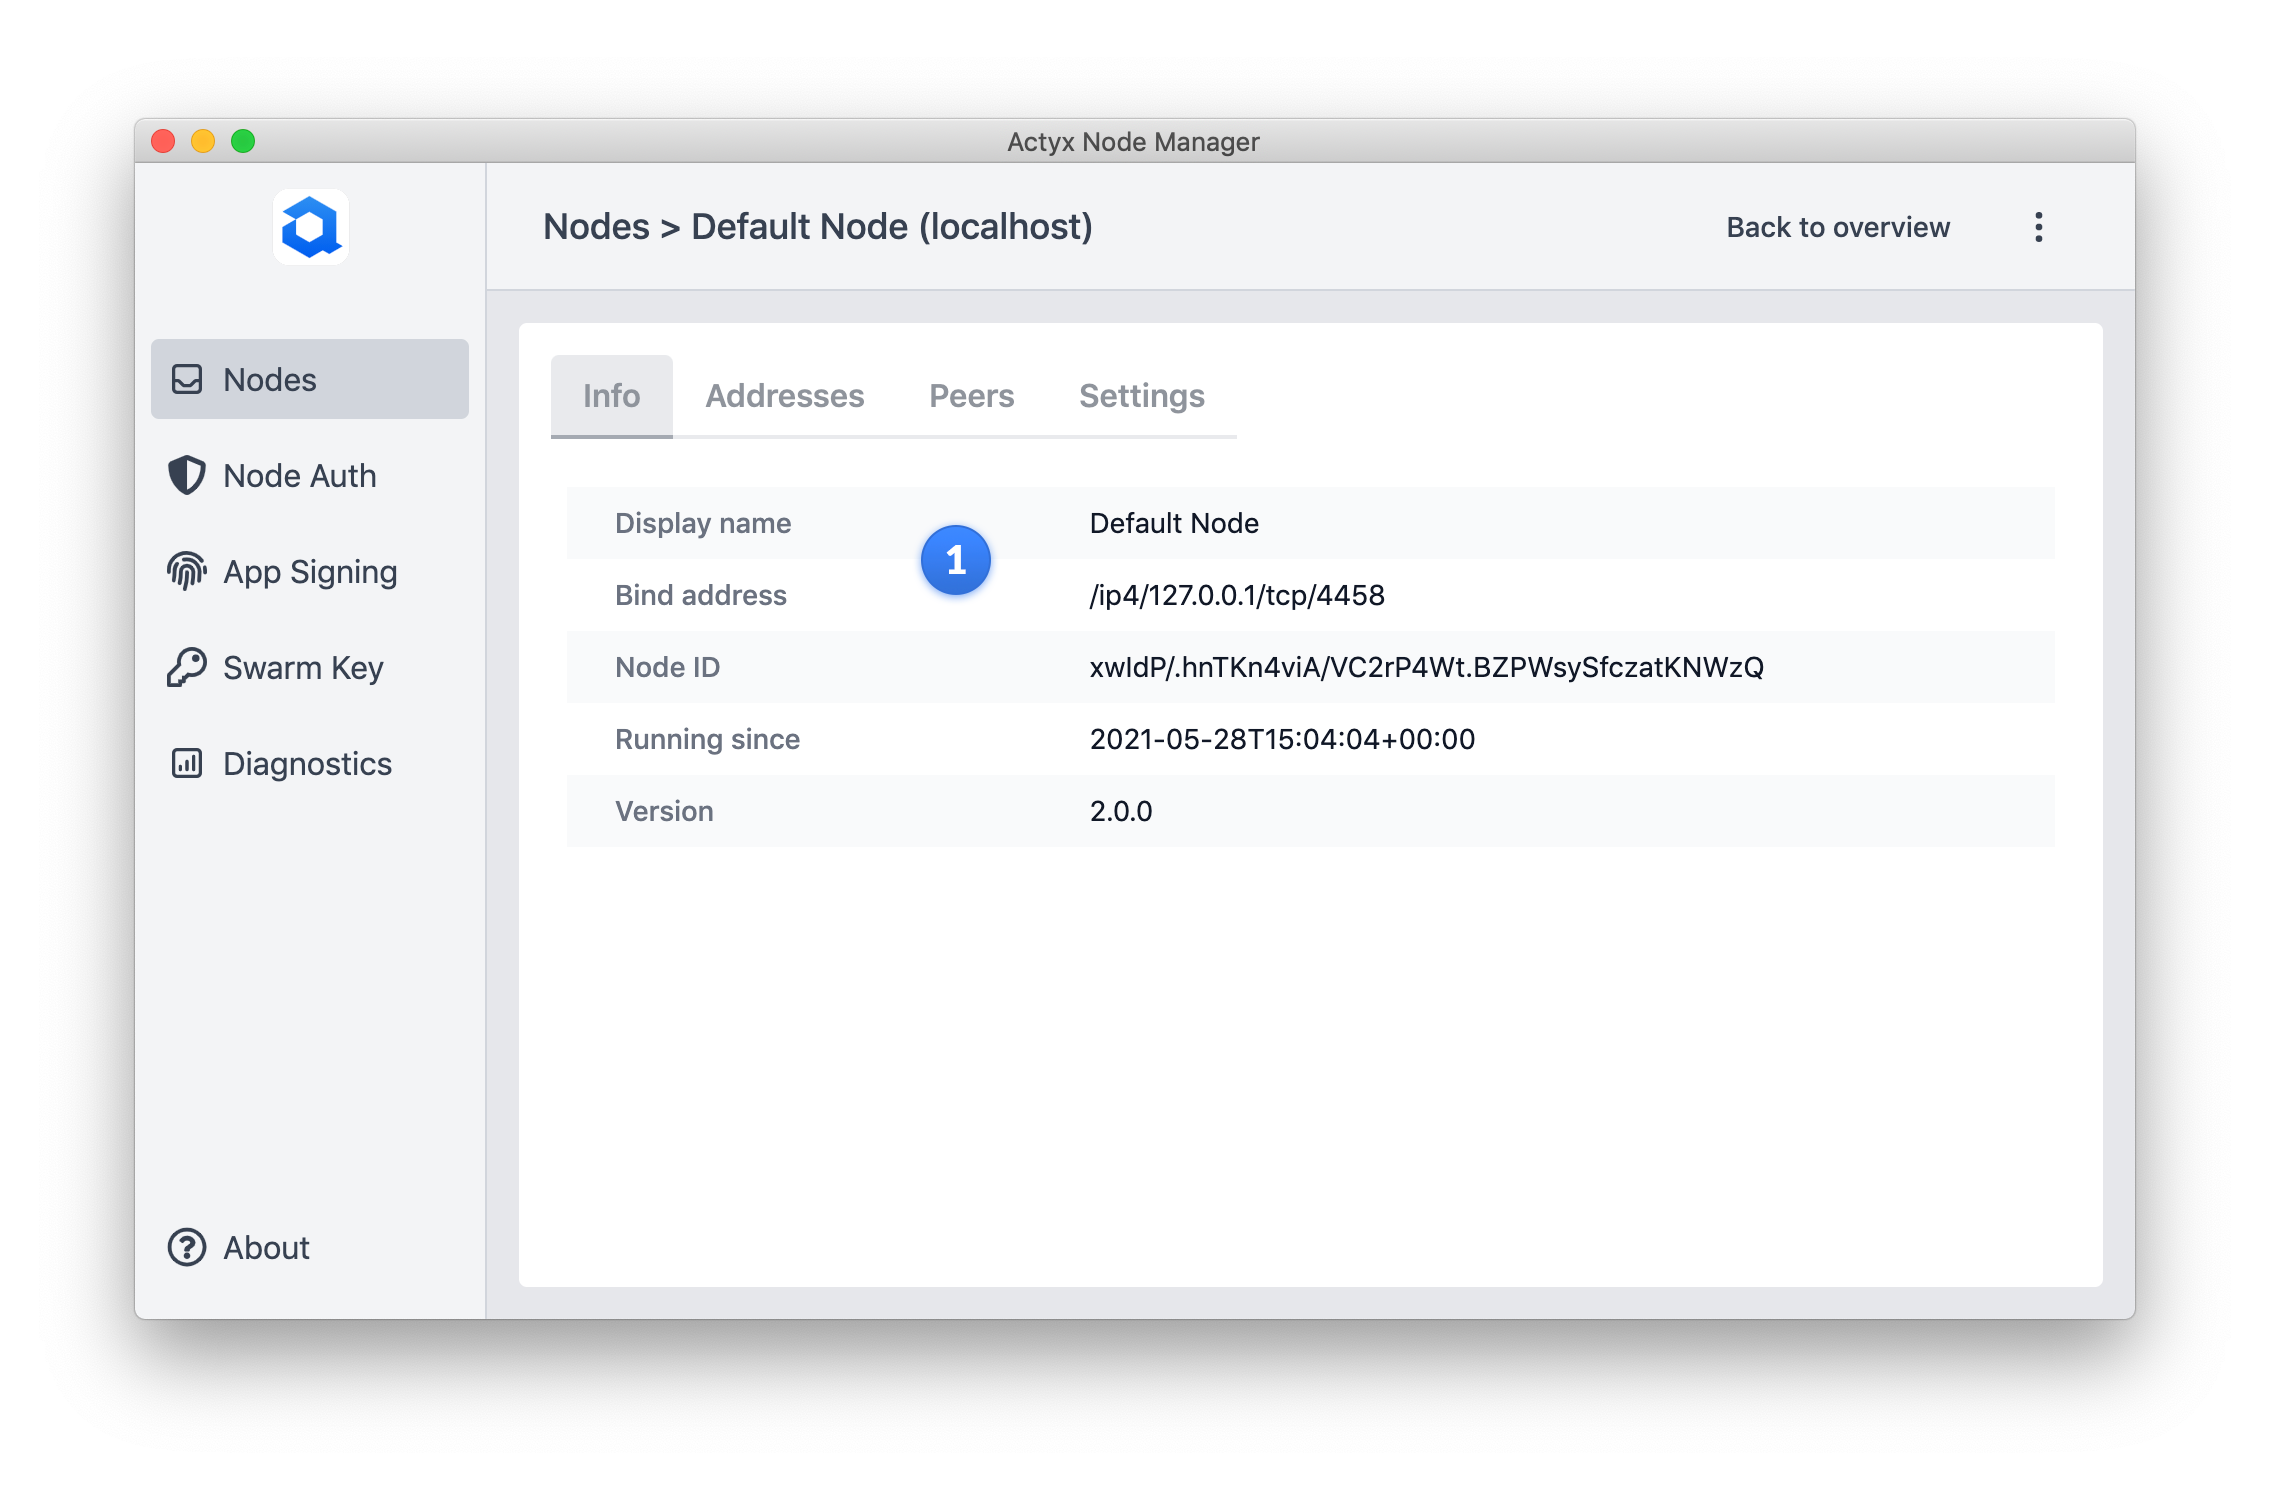
The Info view displays meta info on the selected node. It contains:
- Display name: The display name from the node settings
- Bind address: The IP address of the node that is used to connect to it
- Node ID: The node ID defined by Actyx
- Running since: Timestamp since node was started
- Version: Version number of Actyx installed on this node
2 Addresses
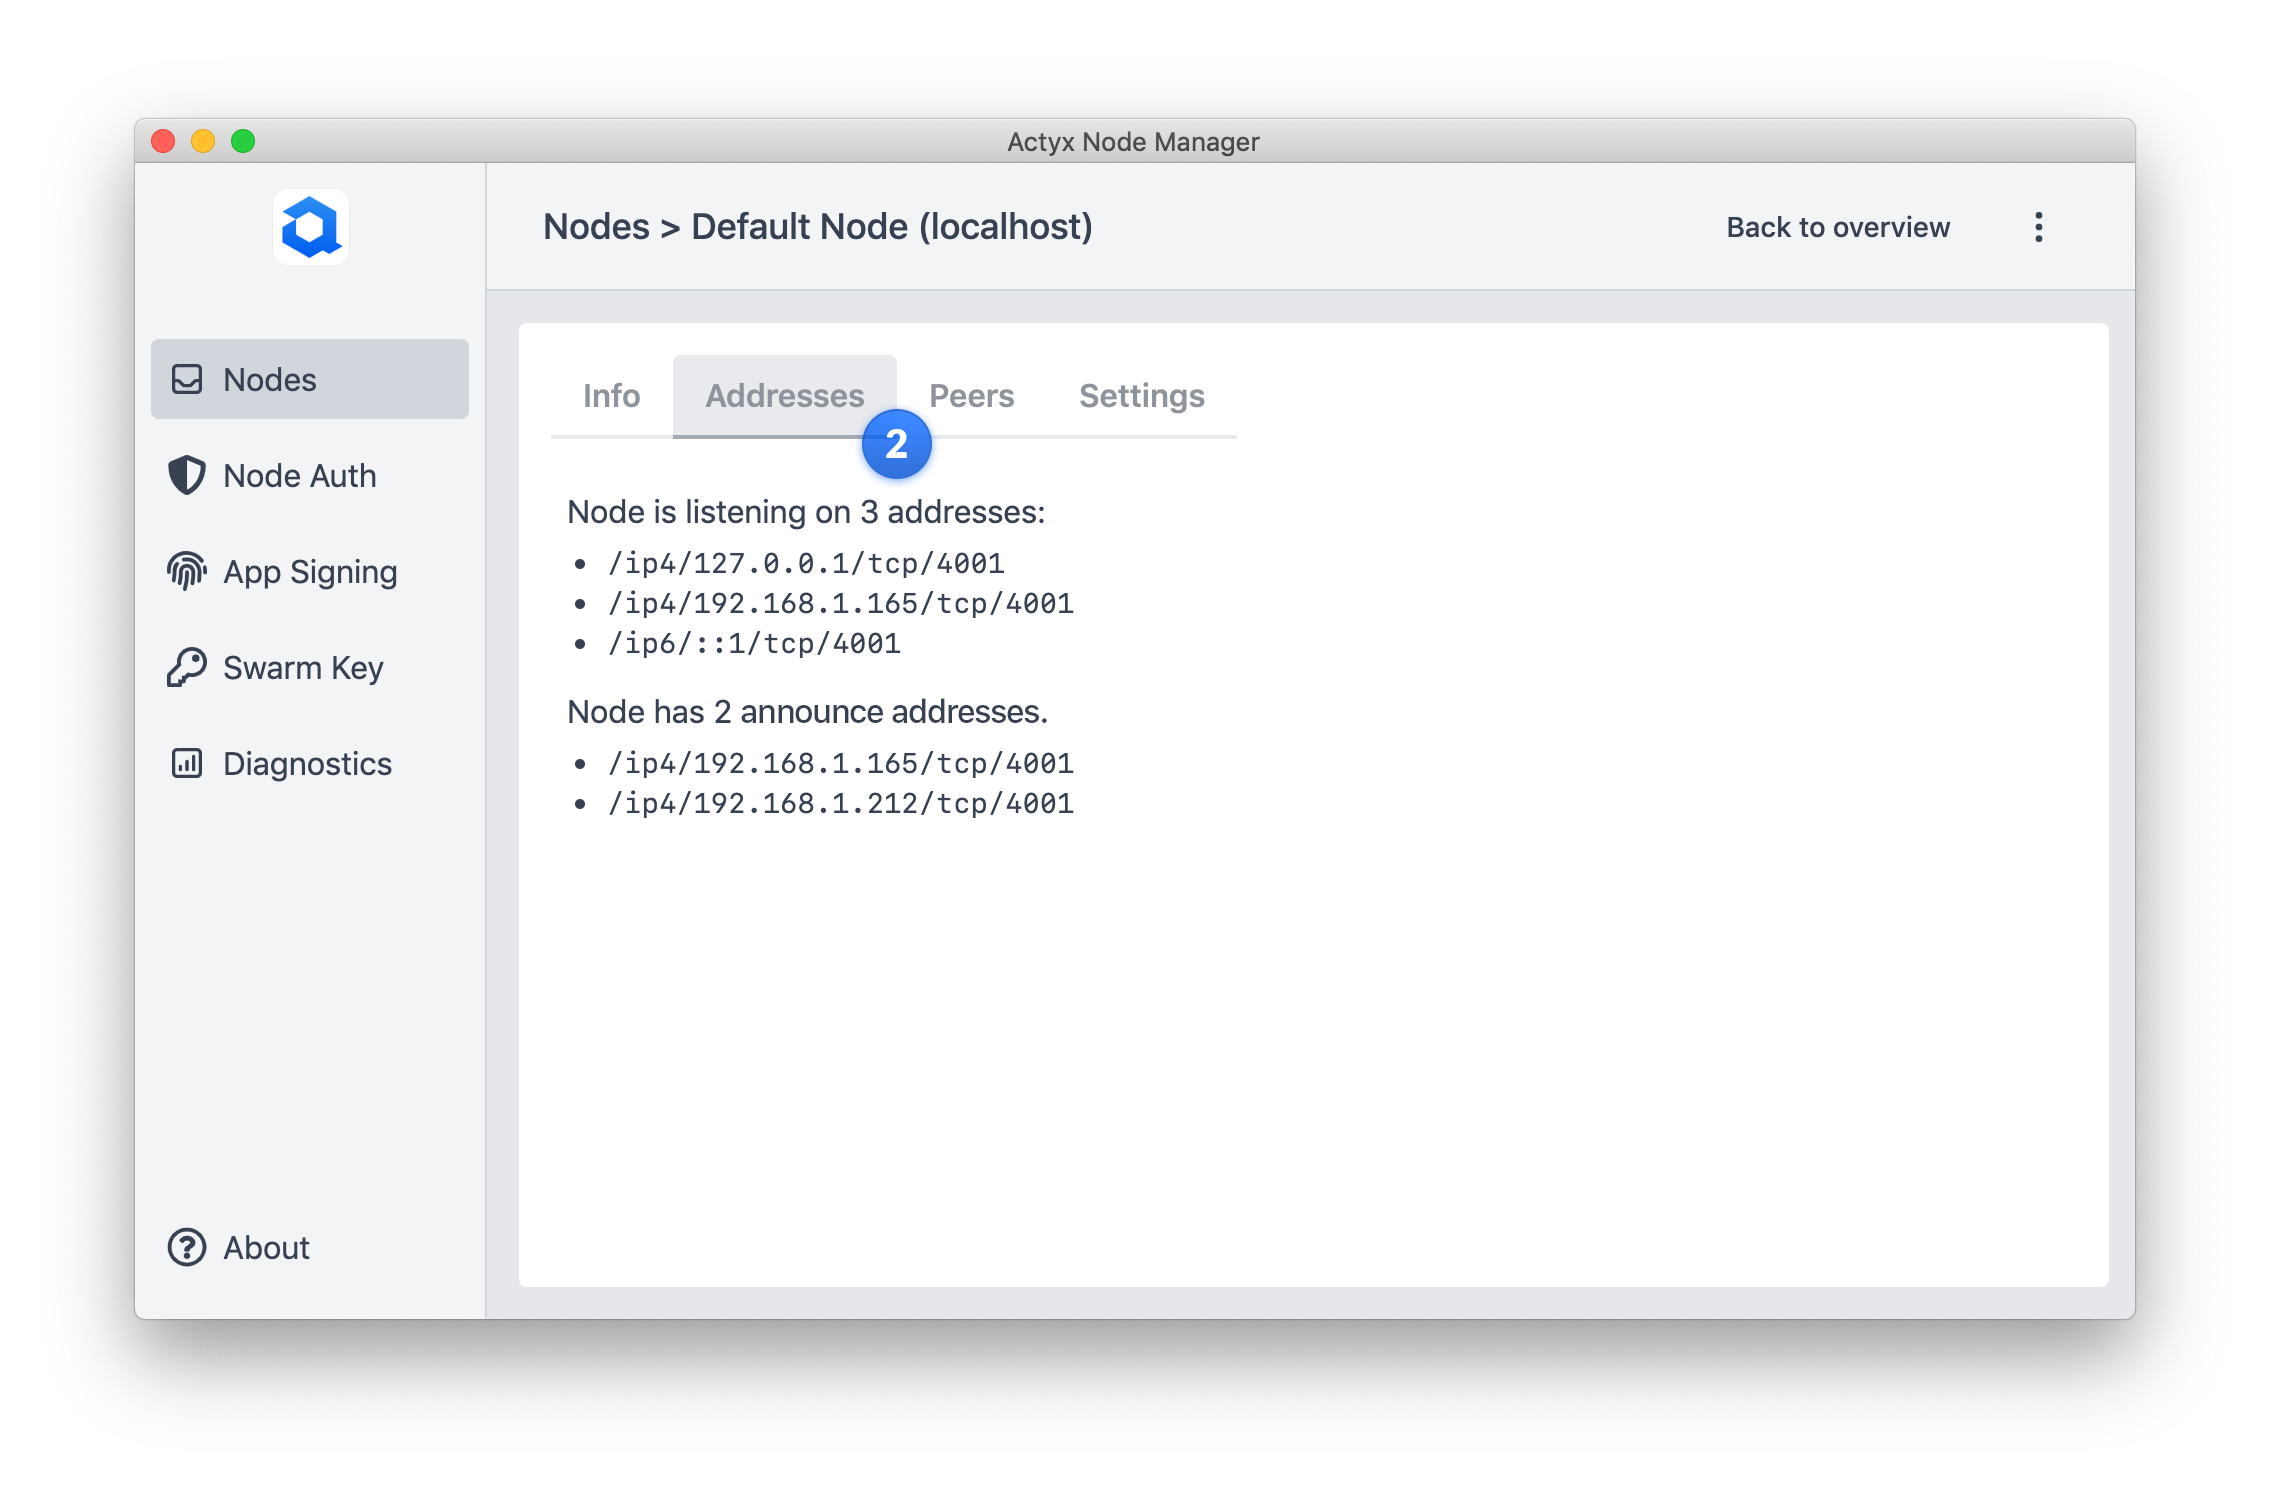
The Addresses view provides network details of the node.
Listen Addresses
The listen addresses are all network interfaces on which port 4001 is bound.
Unless configured otherwise, the listen addresses contain all active network interfaces as Actyx binds to 0.0.0.0 by default.
Announce Addresses
The announce addresses display the addresses defined in the node settings.
For more information on announceAddresses, please refer to our how-to guide.
3 Peers
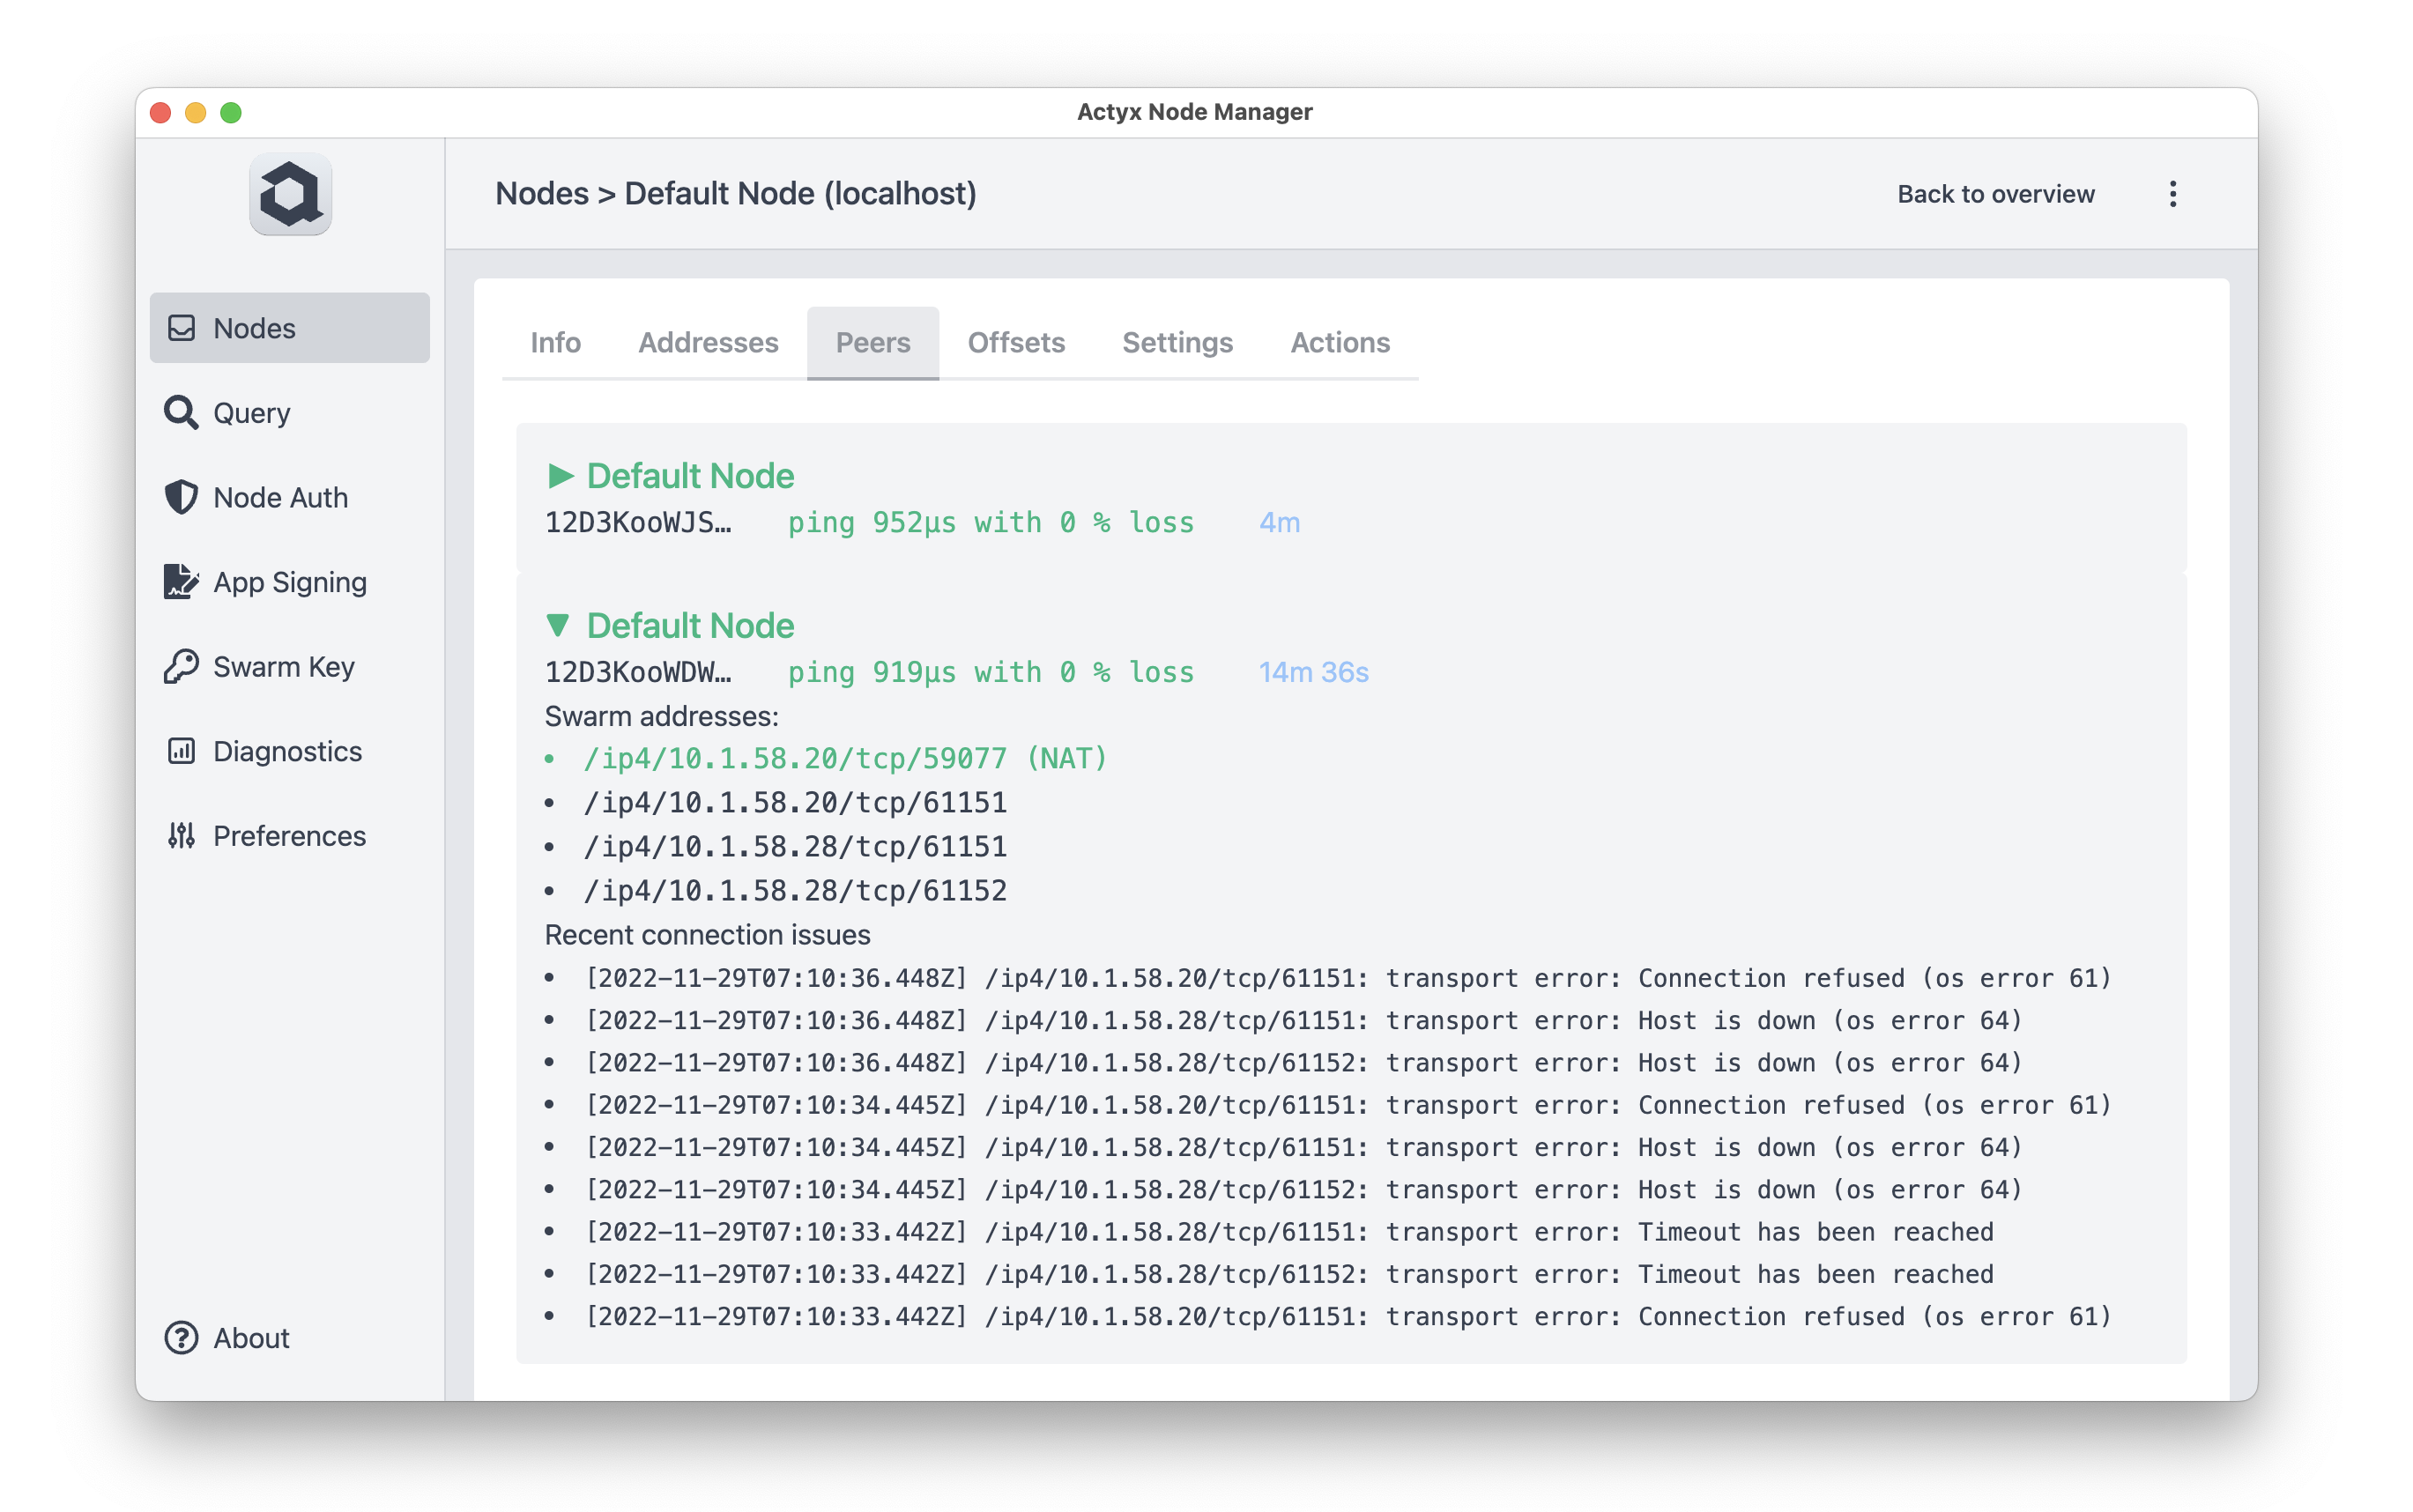
The Peers view displays all peers of the selected node together with its ping stats and connection time. Actyx aims at keeping stable connections between peers, so seeing short times here may be indicative of network issues. The ping stats tell you more about the round-trip latency of the network connection between the nodes as well as the failure rate.
You can click on each one to expand more details, as is shown for the lower one. Besides all known (and previously known) addresses for this node you can also inspect the most recent connection issues. While “connection refused” usually means that Actyx is not running, “timeout” errors often indicate a firewall problem.
4 Offsets
The Offsets tab shows all event streams known by the node as well as the current offsets:
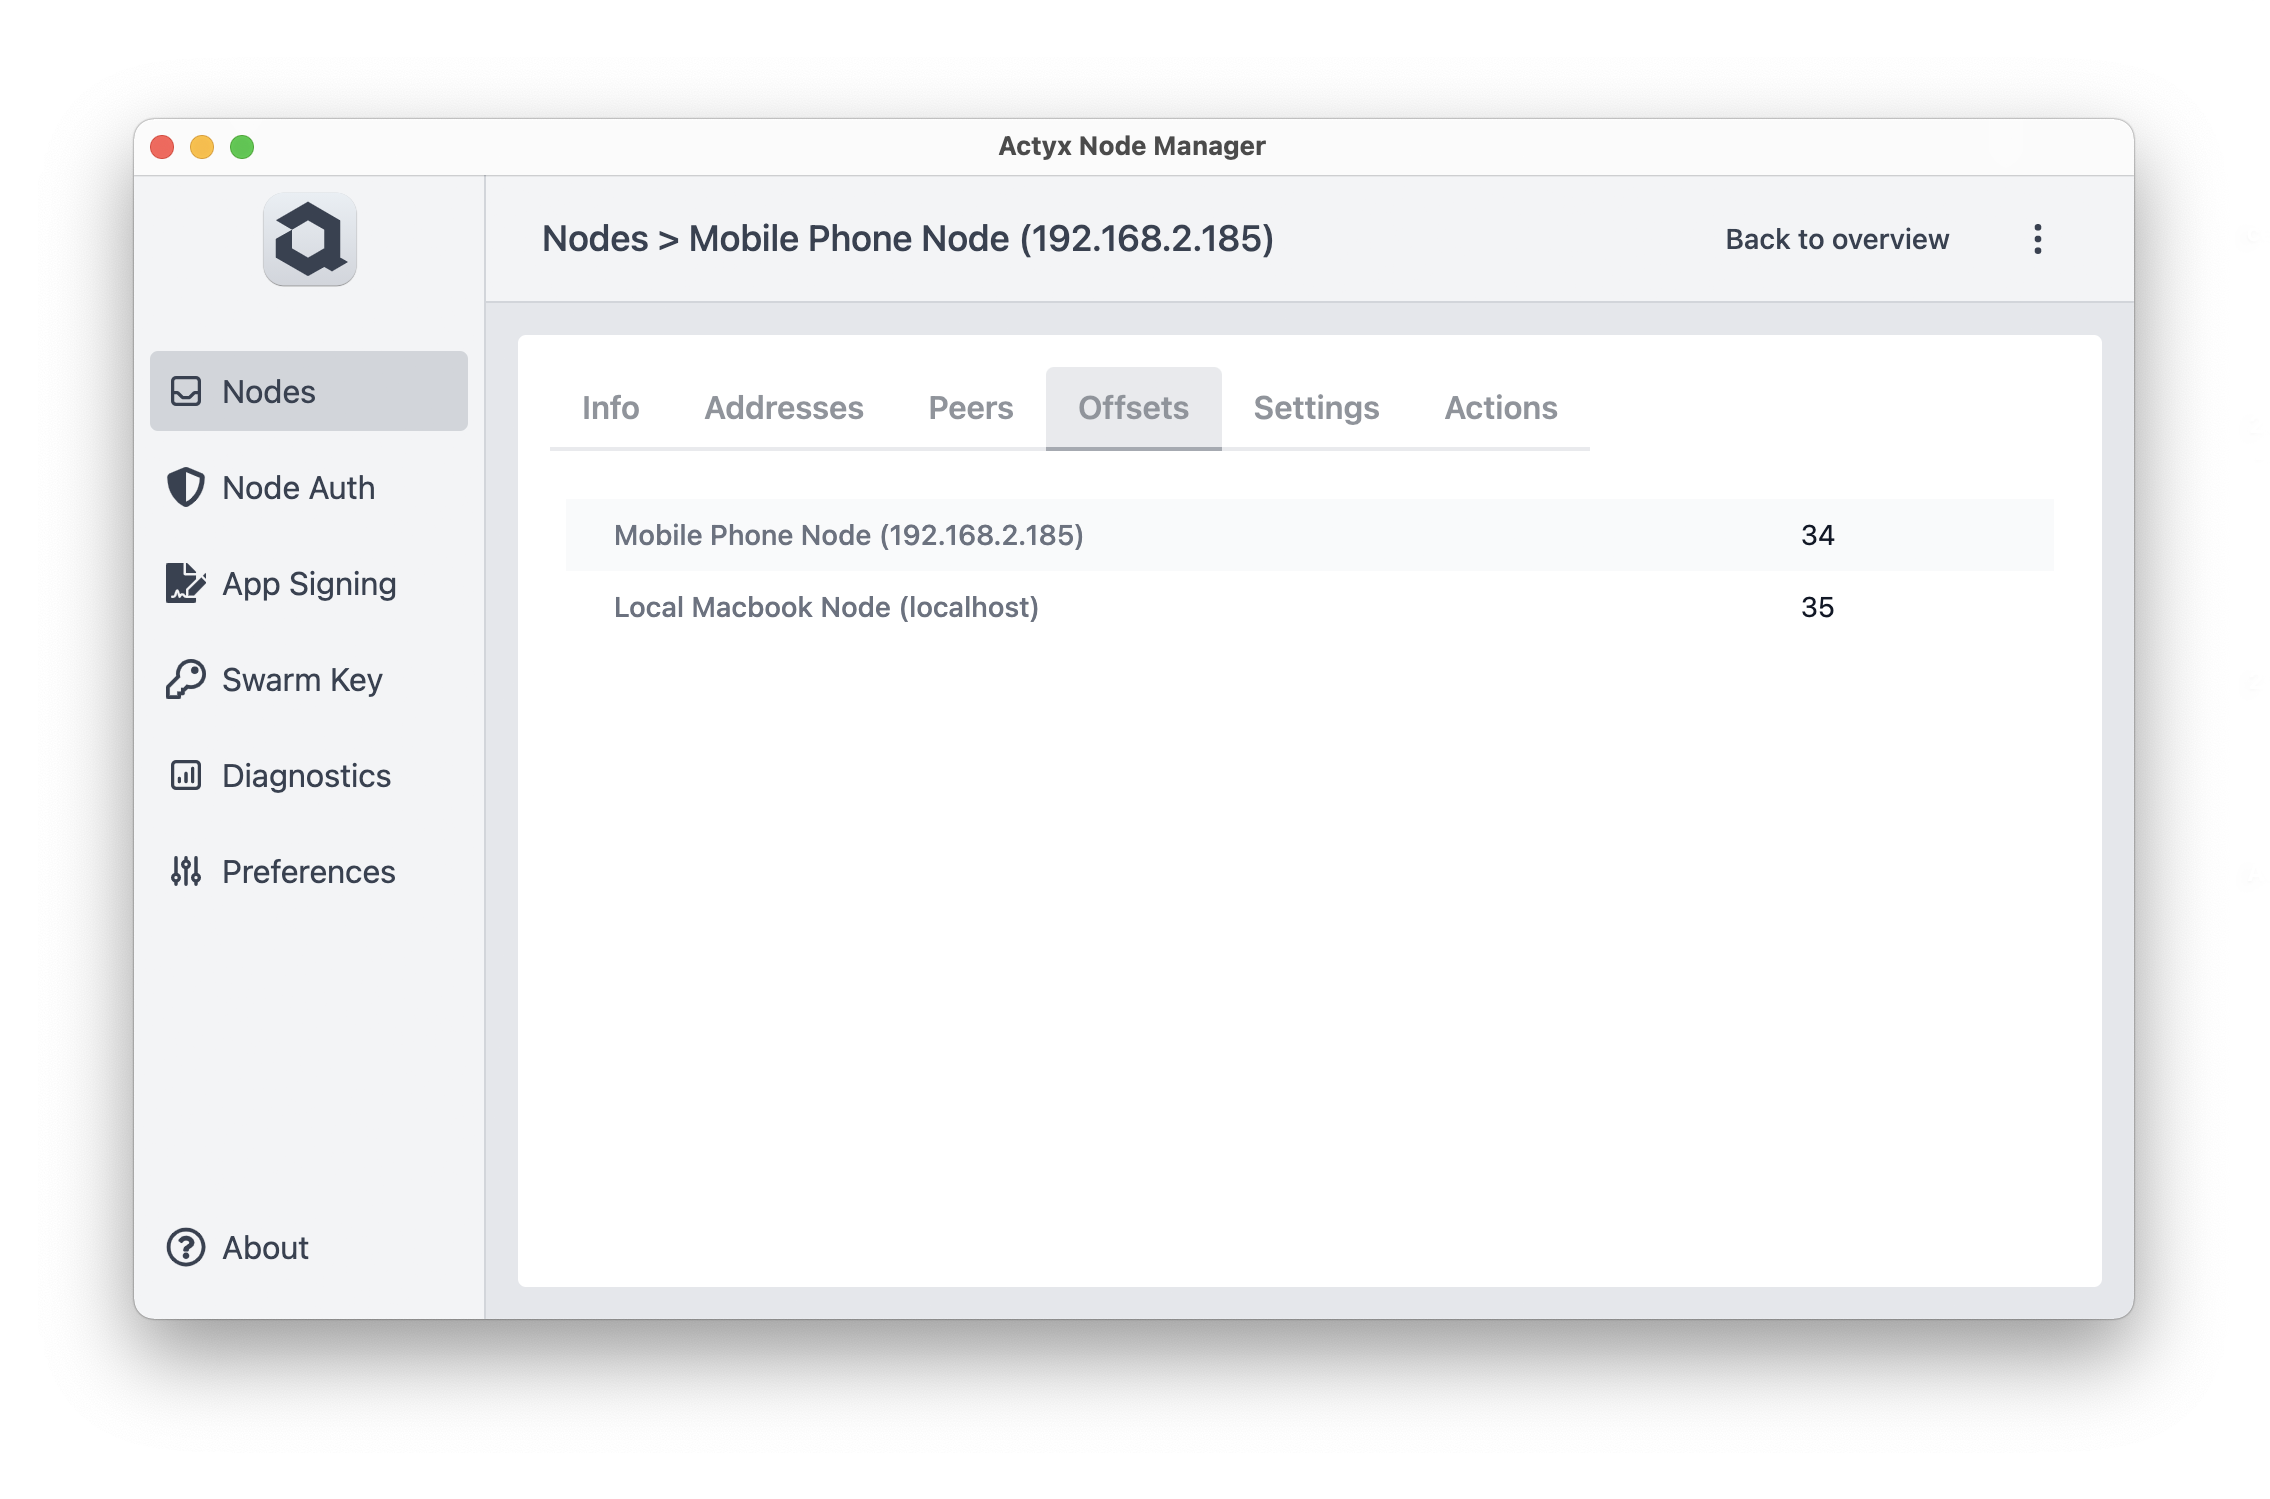
Additionally, the number of events the node knows it must get, but hasn't gotten yet is also shown where applicable.
5 Settings
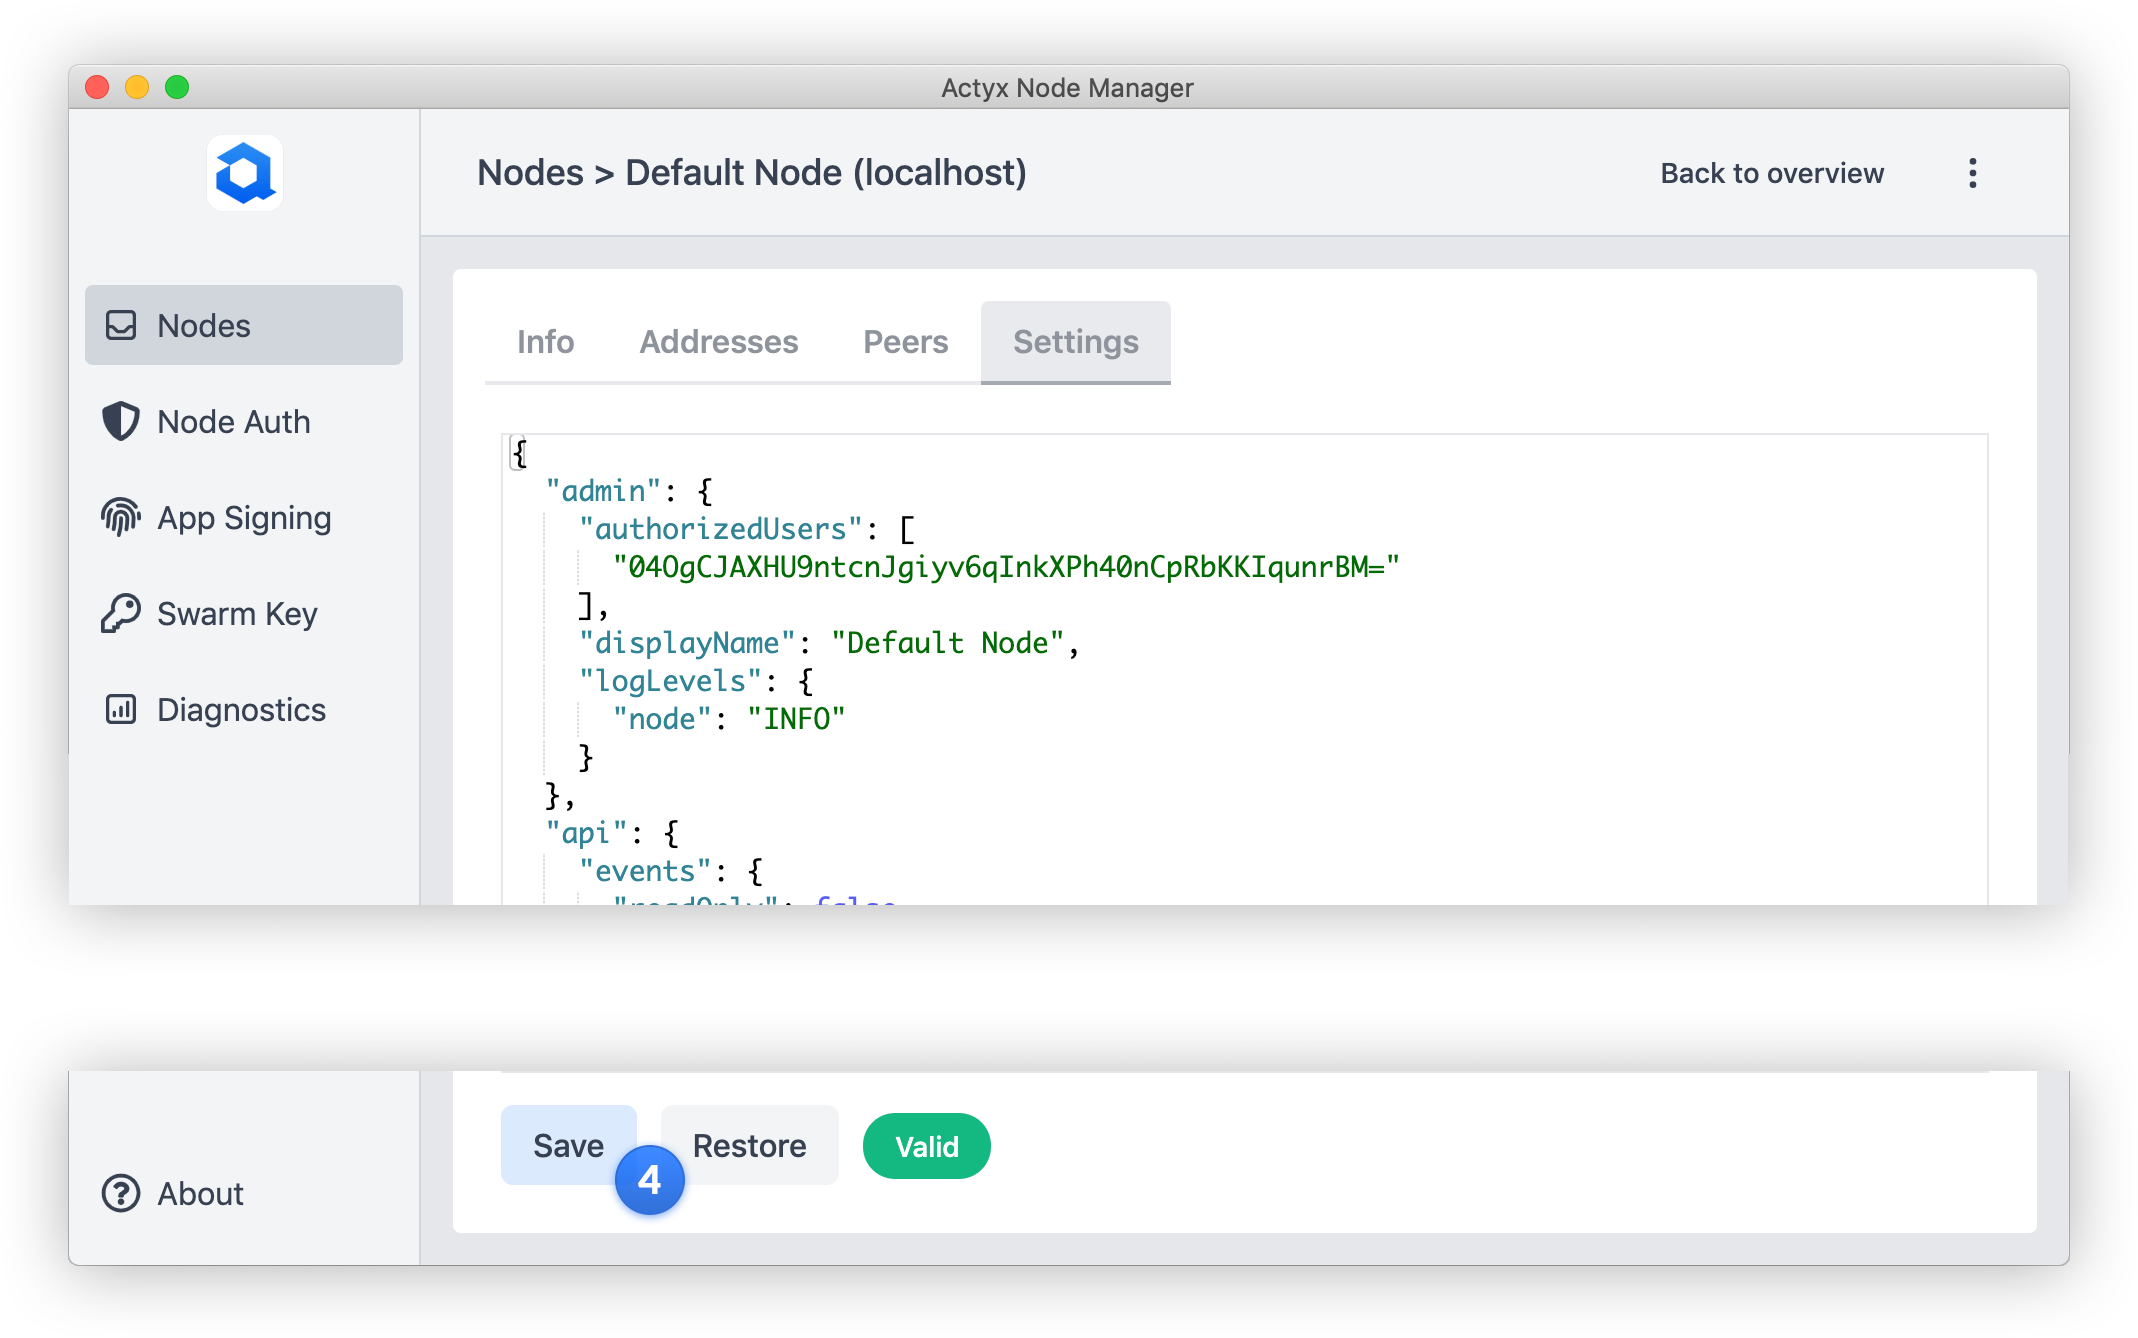
The Settings view provides an editor where you can manage the node settings. The settings are constantly validated against the node settings schema. If you want to revert the changes you made since they were last saved, simply press the Restore button.
Setting up user keys
Actyx Node Manager lets you create user keys so that you can establish an authorized connection to the node. For more information on user keys, please refer to our how-to guide.
1 No user keys found
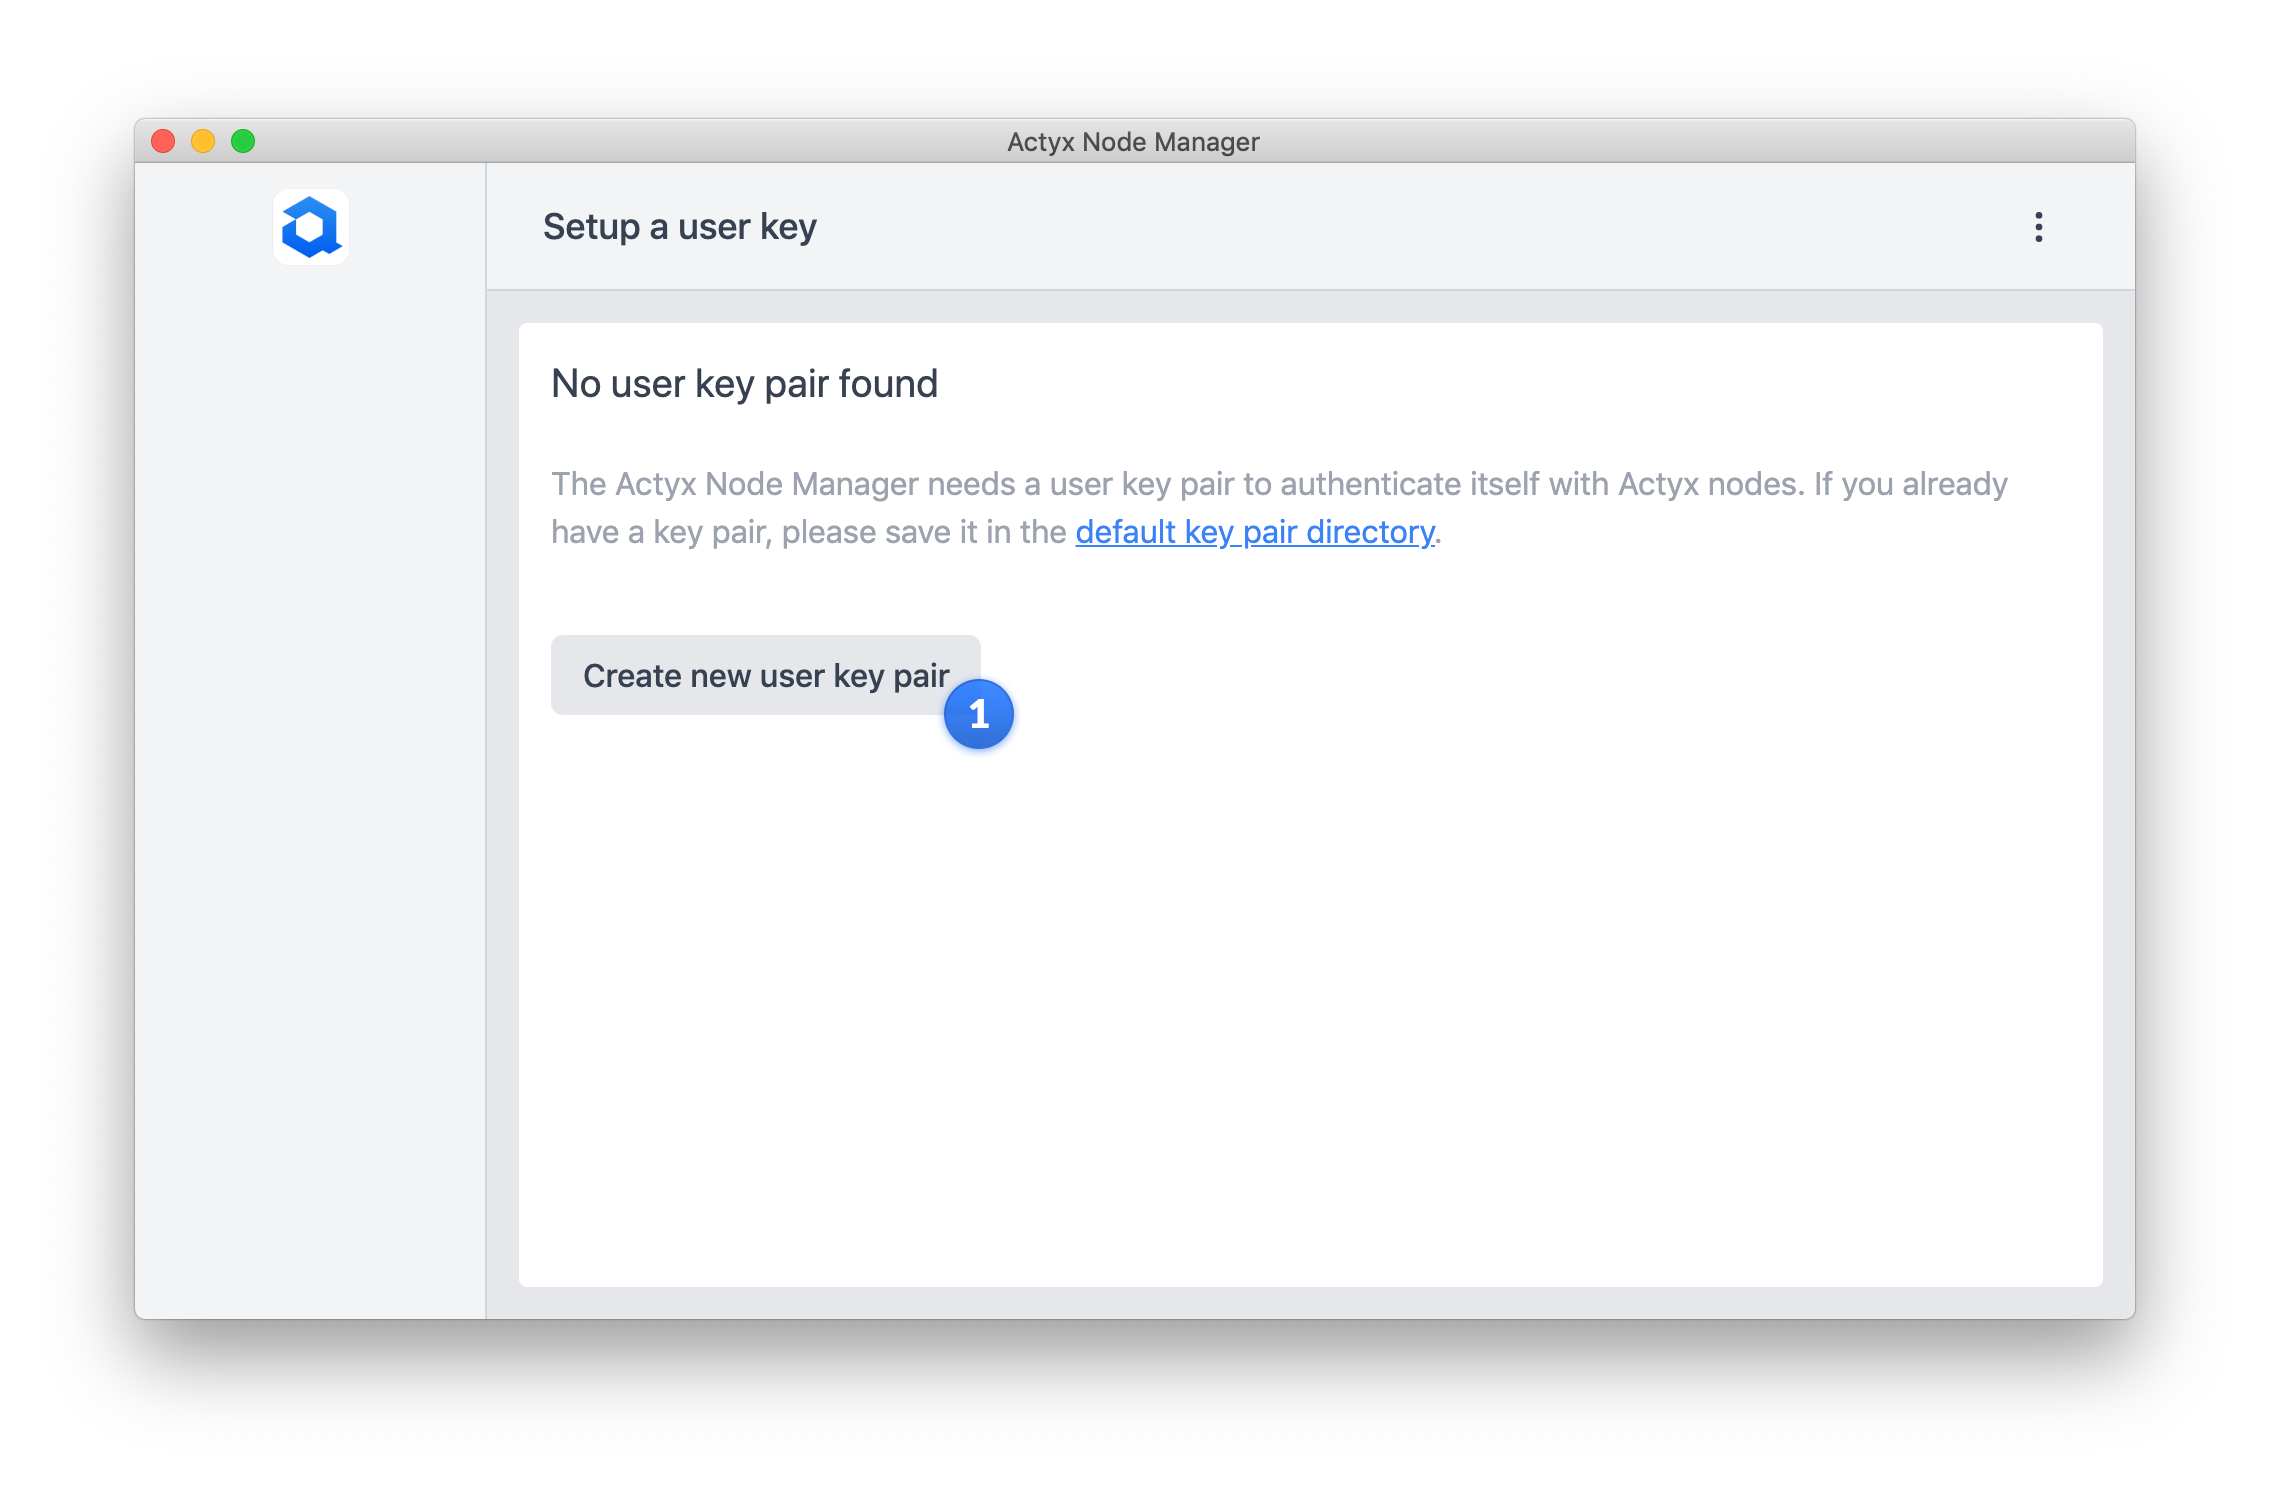
If you open the Node Manager and it cannot find user keys in the default location, it will ask you to create a pair of user keys.
2 User key pair created
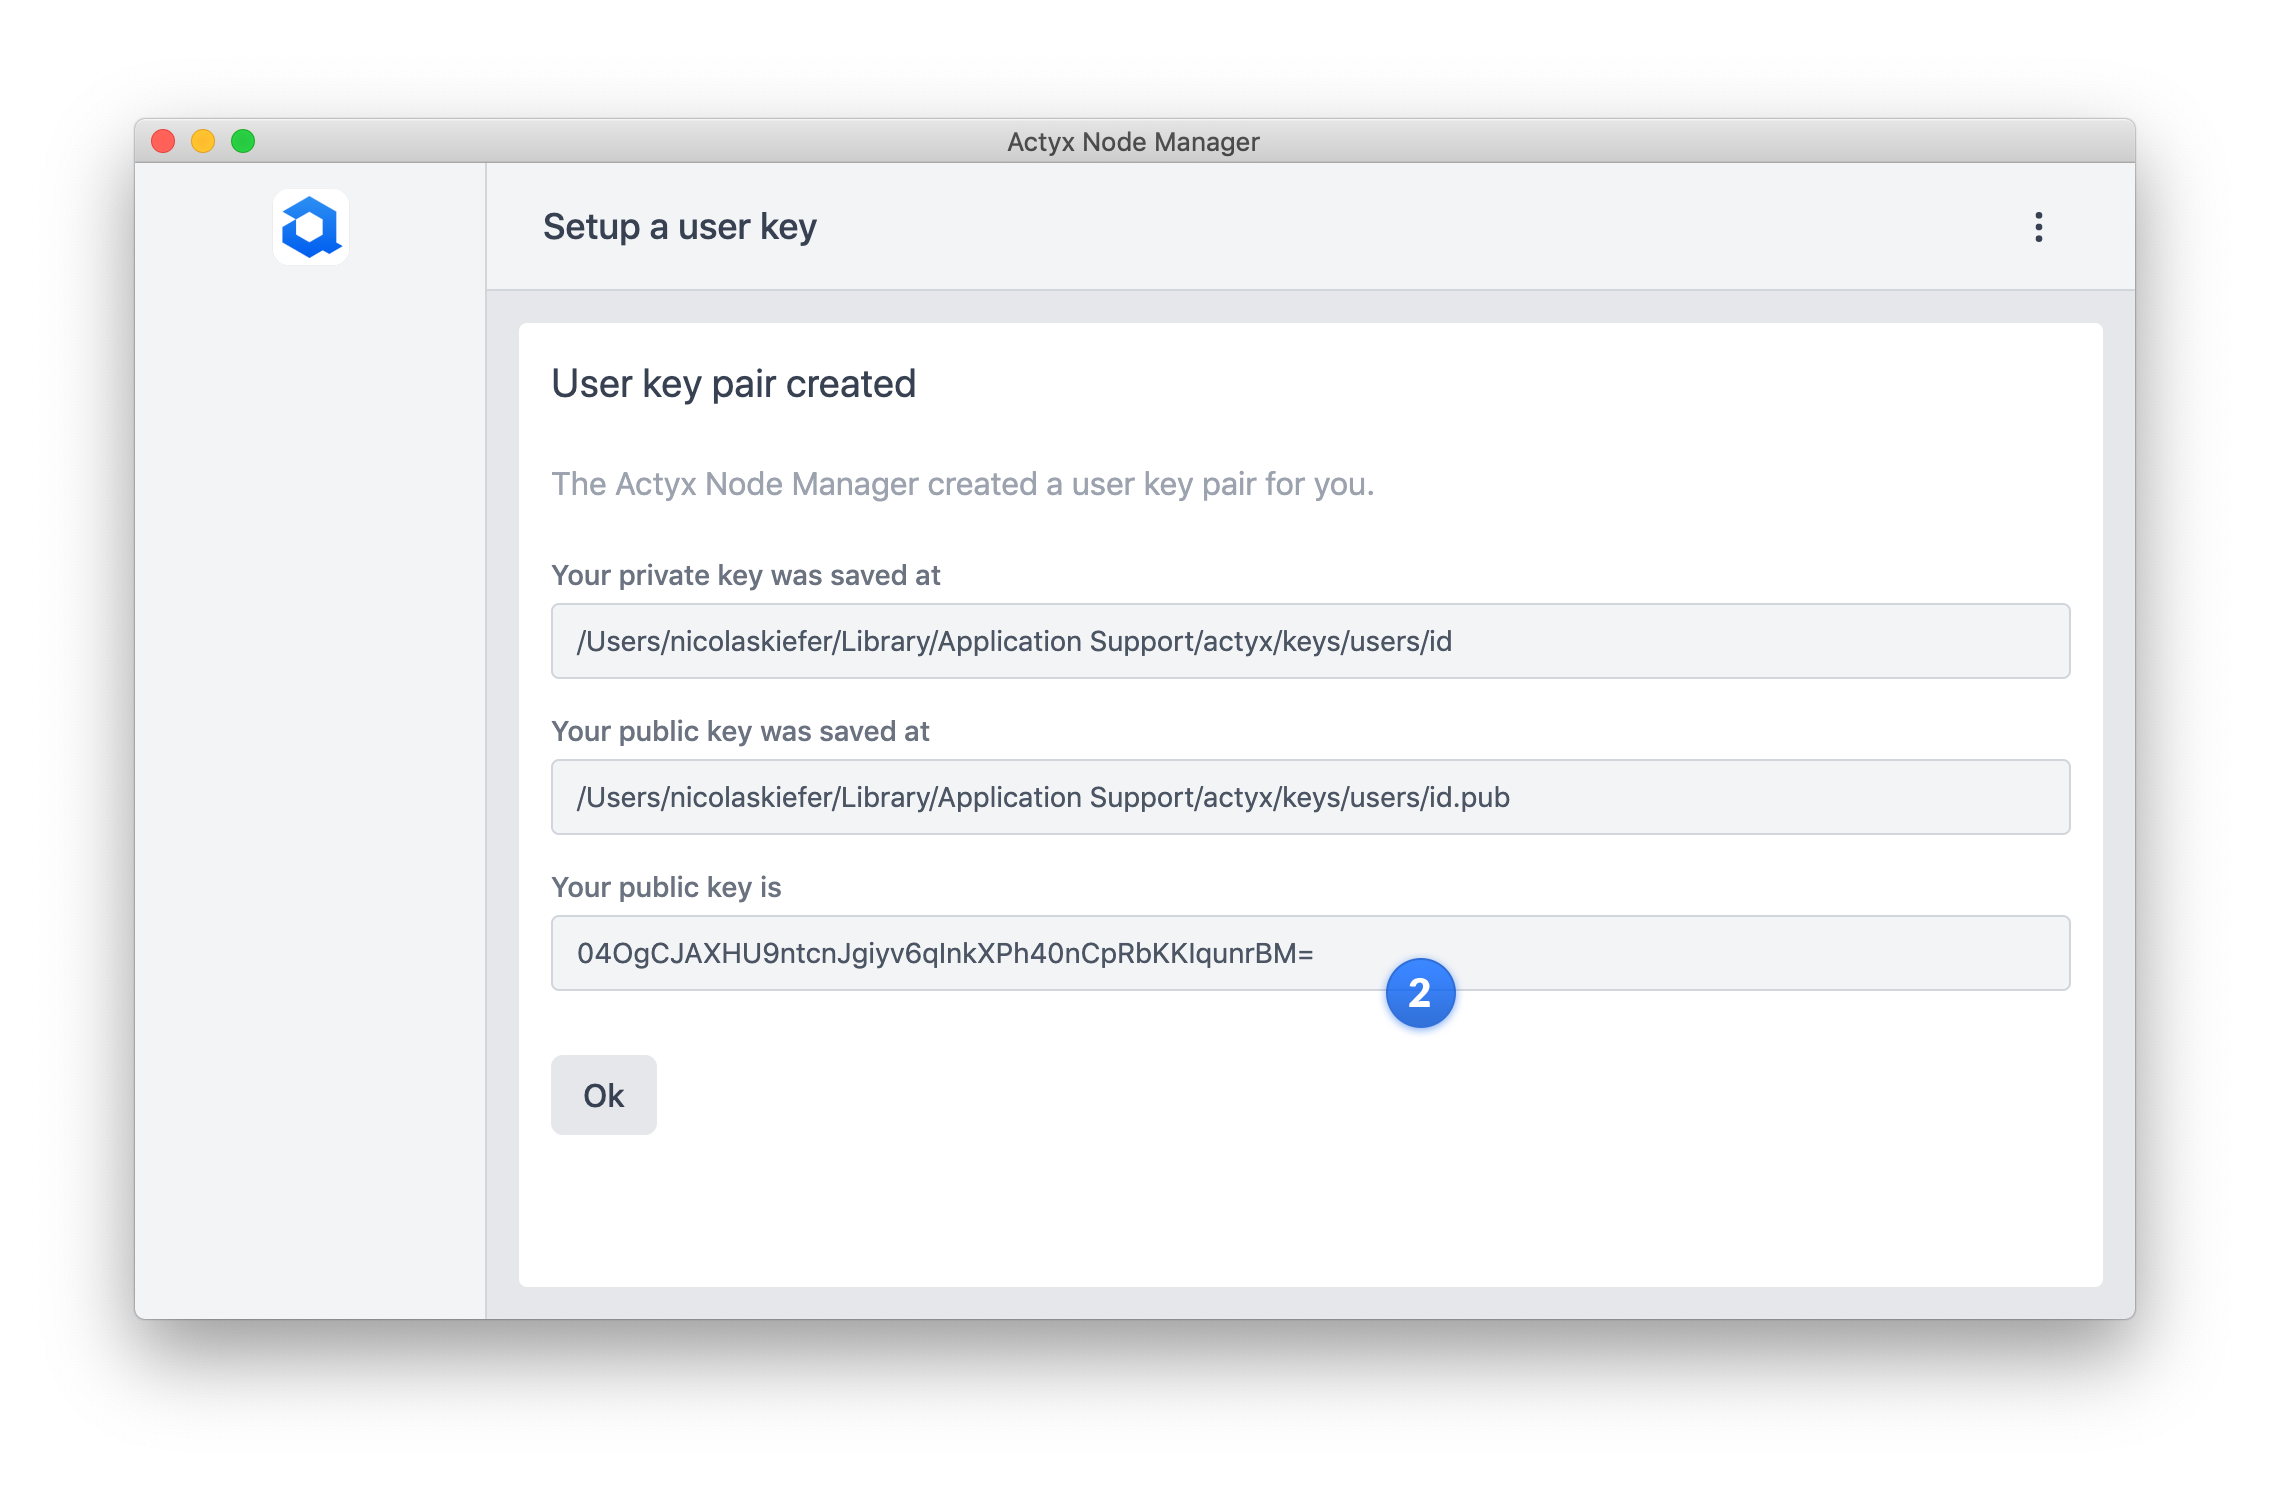
Once you have created the keys, Node Manager displays the location on your device where it saved the user keys as well as your public key.
3 Create additional keys
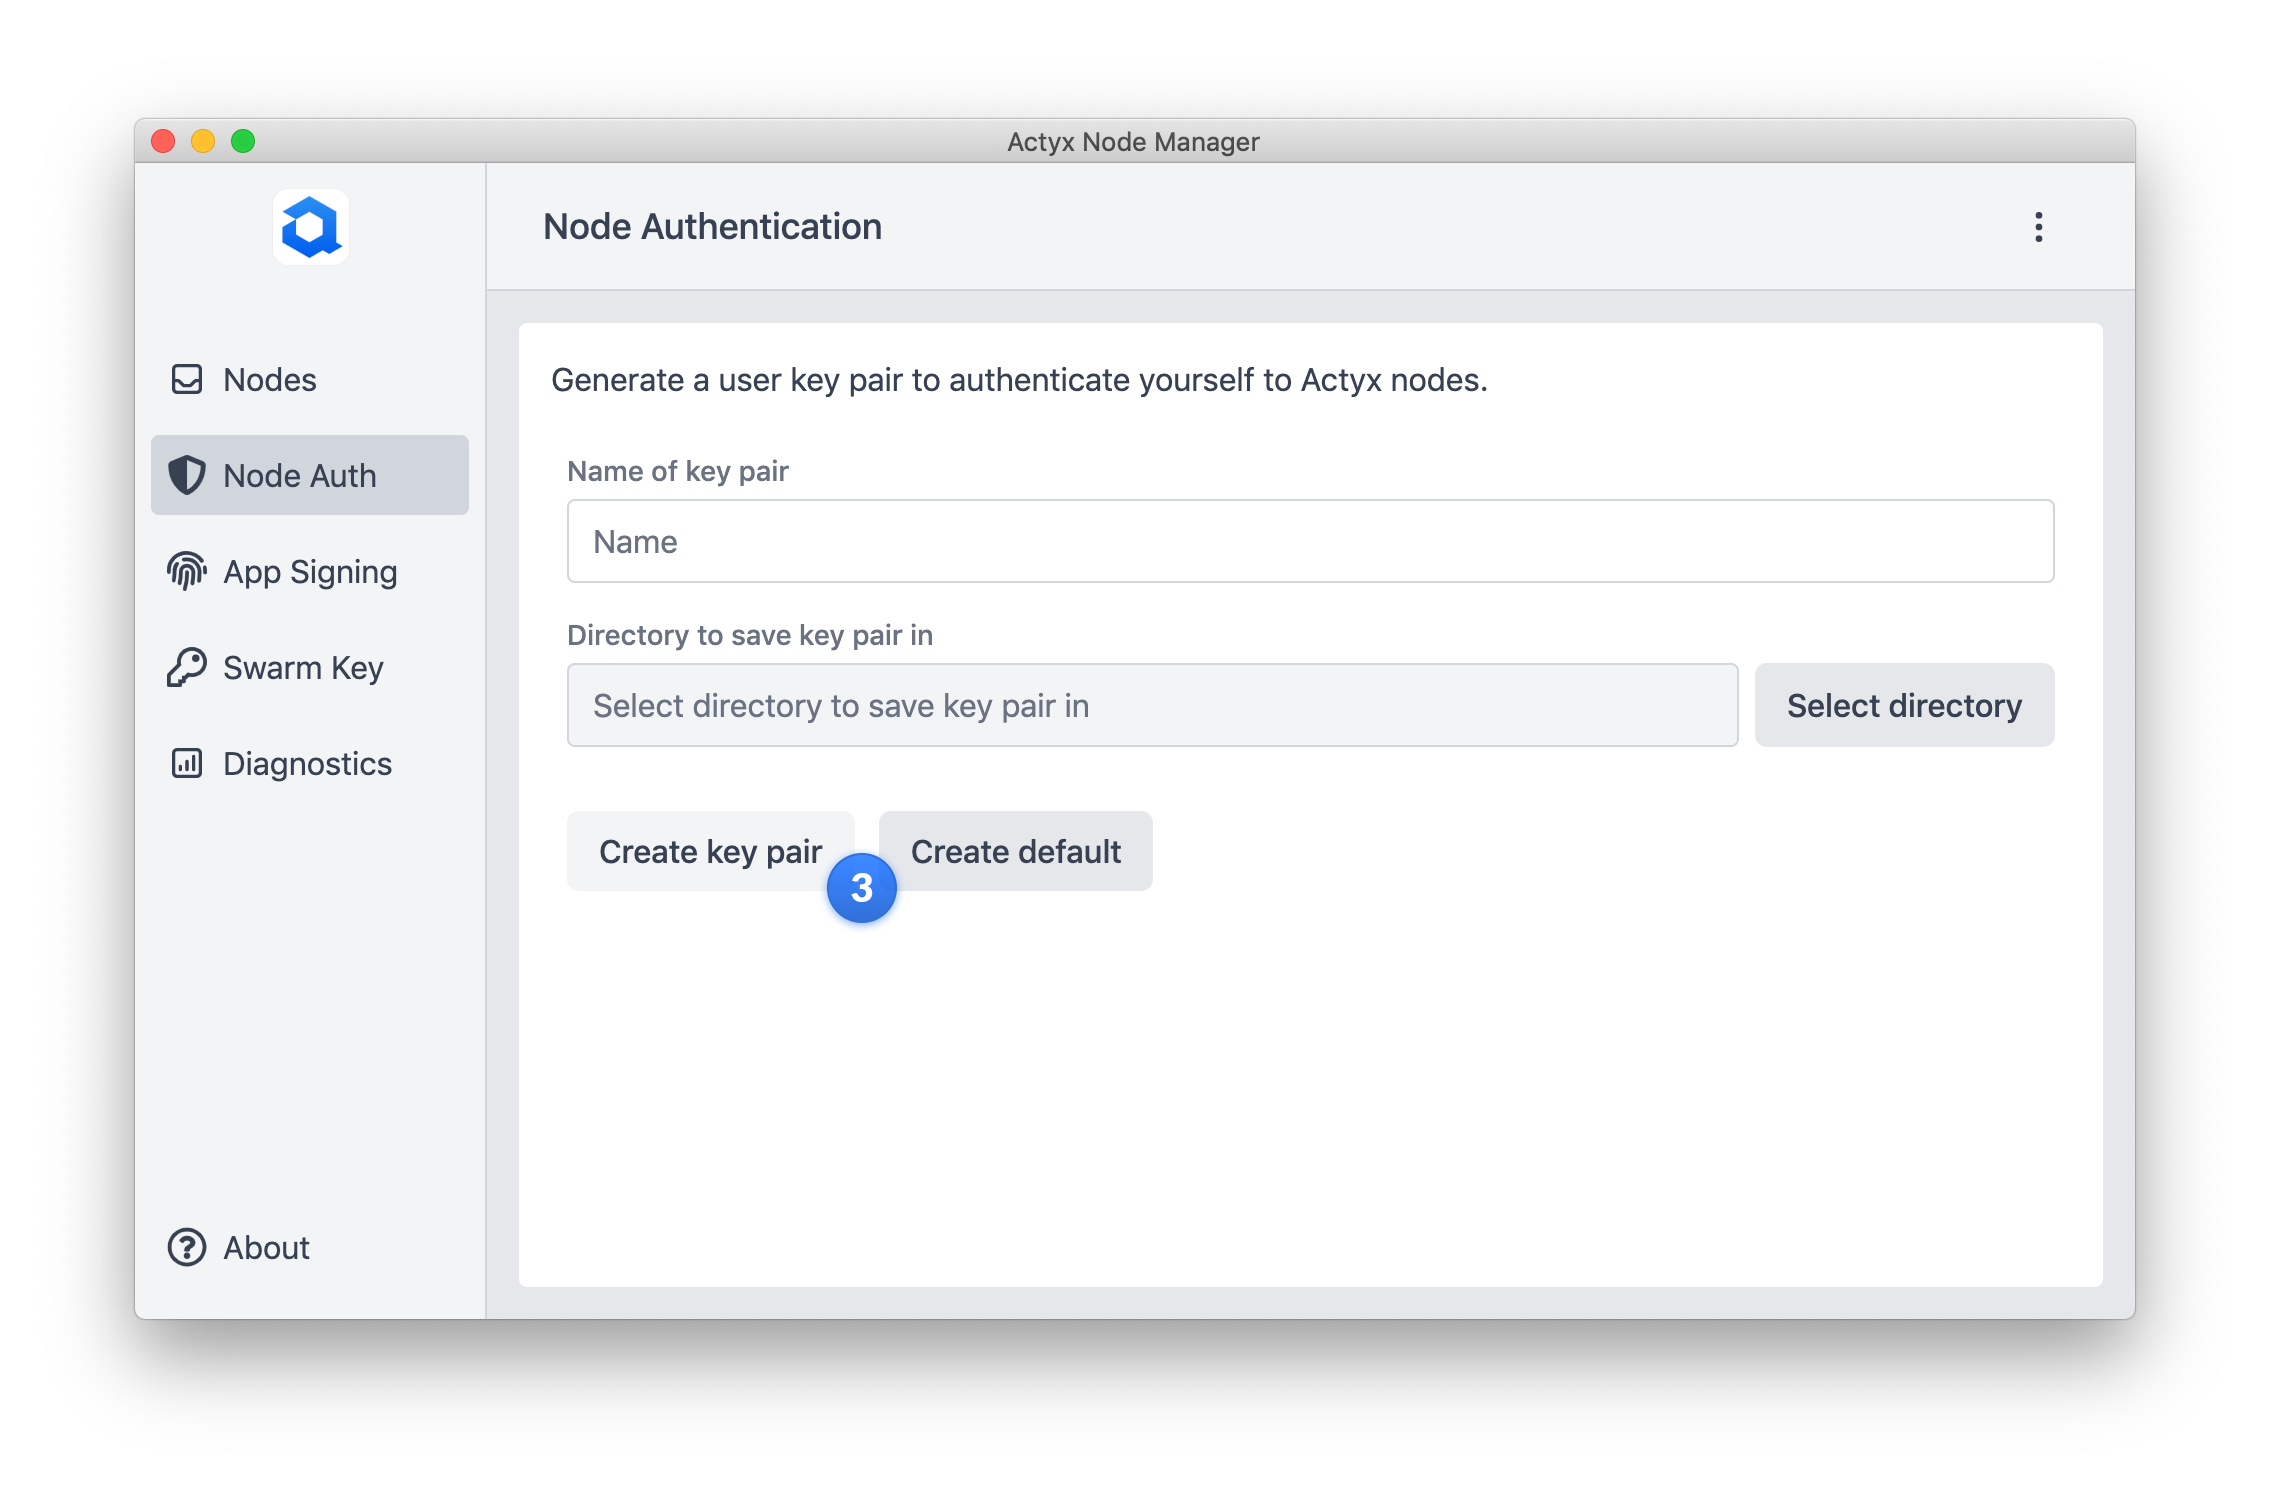
You can at any time create additional user keys by defining a name and a location where to save the key pair. On button click, another key pair is generated.
Signing an app manifest
Actyx Node Manager lets you sign app manifests so that you can authenticate your app with the node and access its APIs. For more information on app signing, please refer to our how-to guide.
1 Selecting necessary files
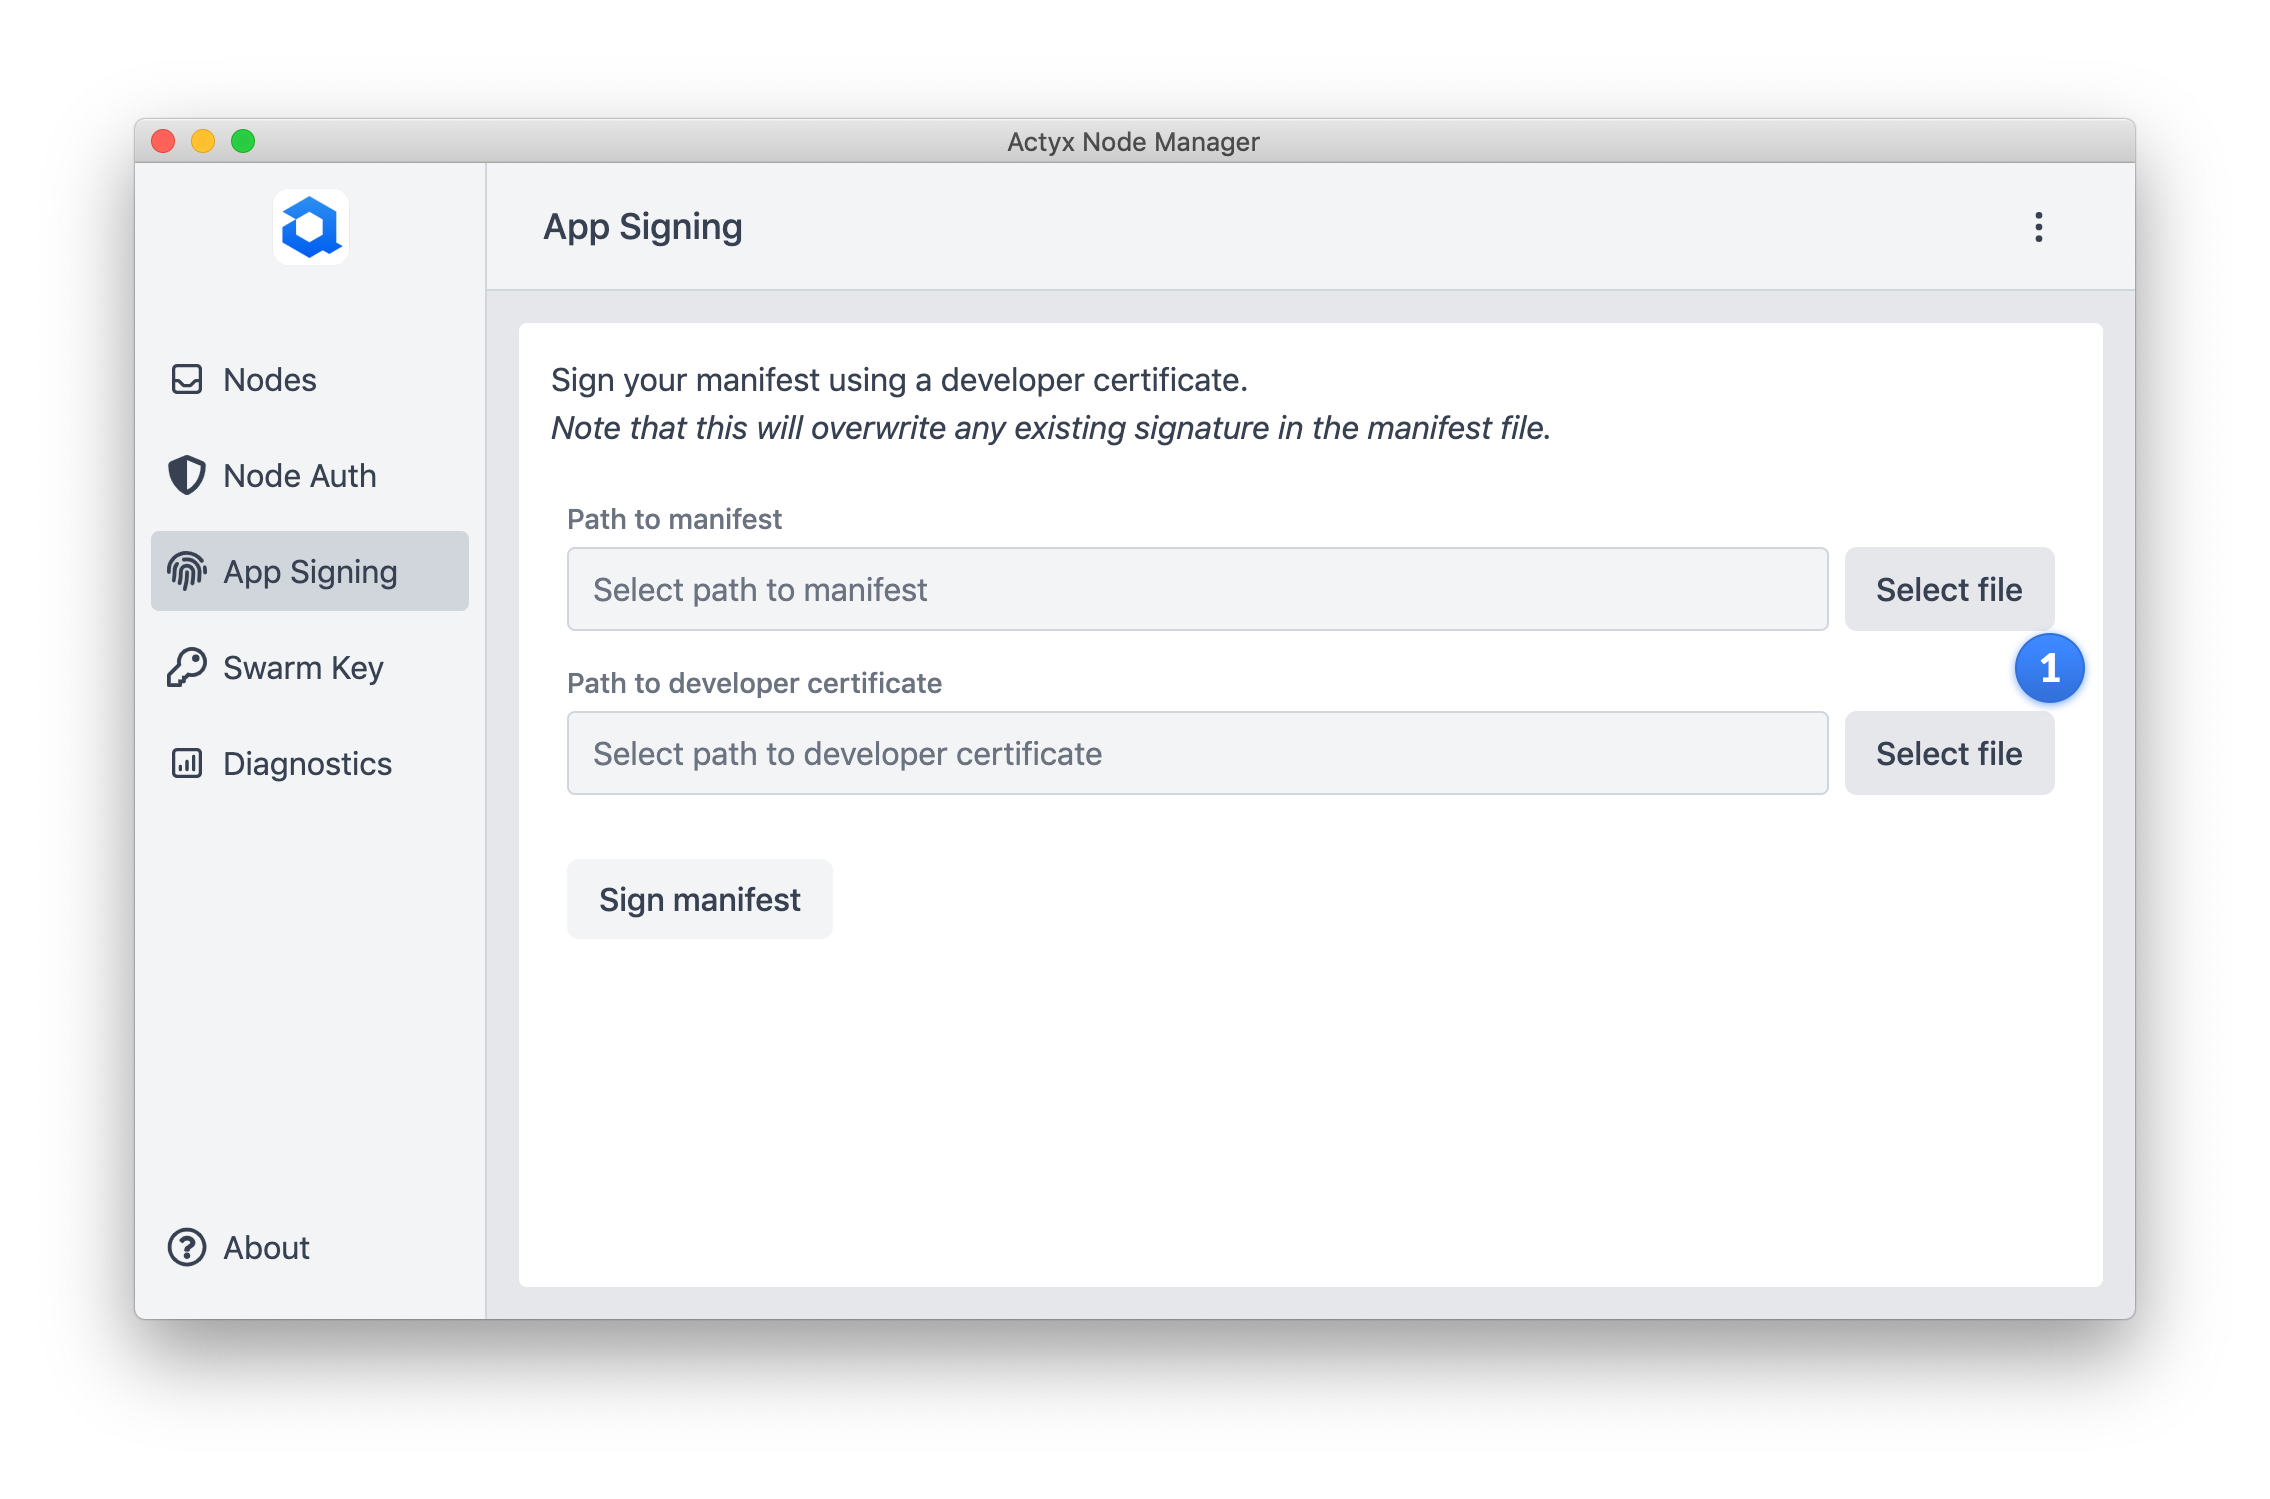
To sign an app manifest, you need to select two files from your disc. The first one is the manifest you want to sign, the second one is your Actyx developer certificate.
2 Signing
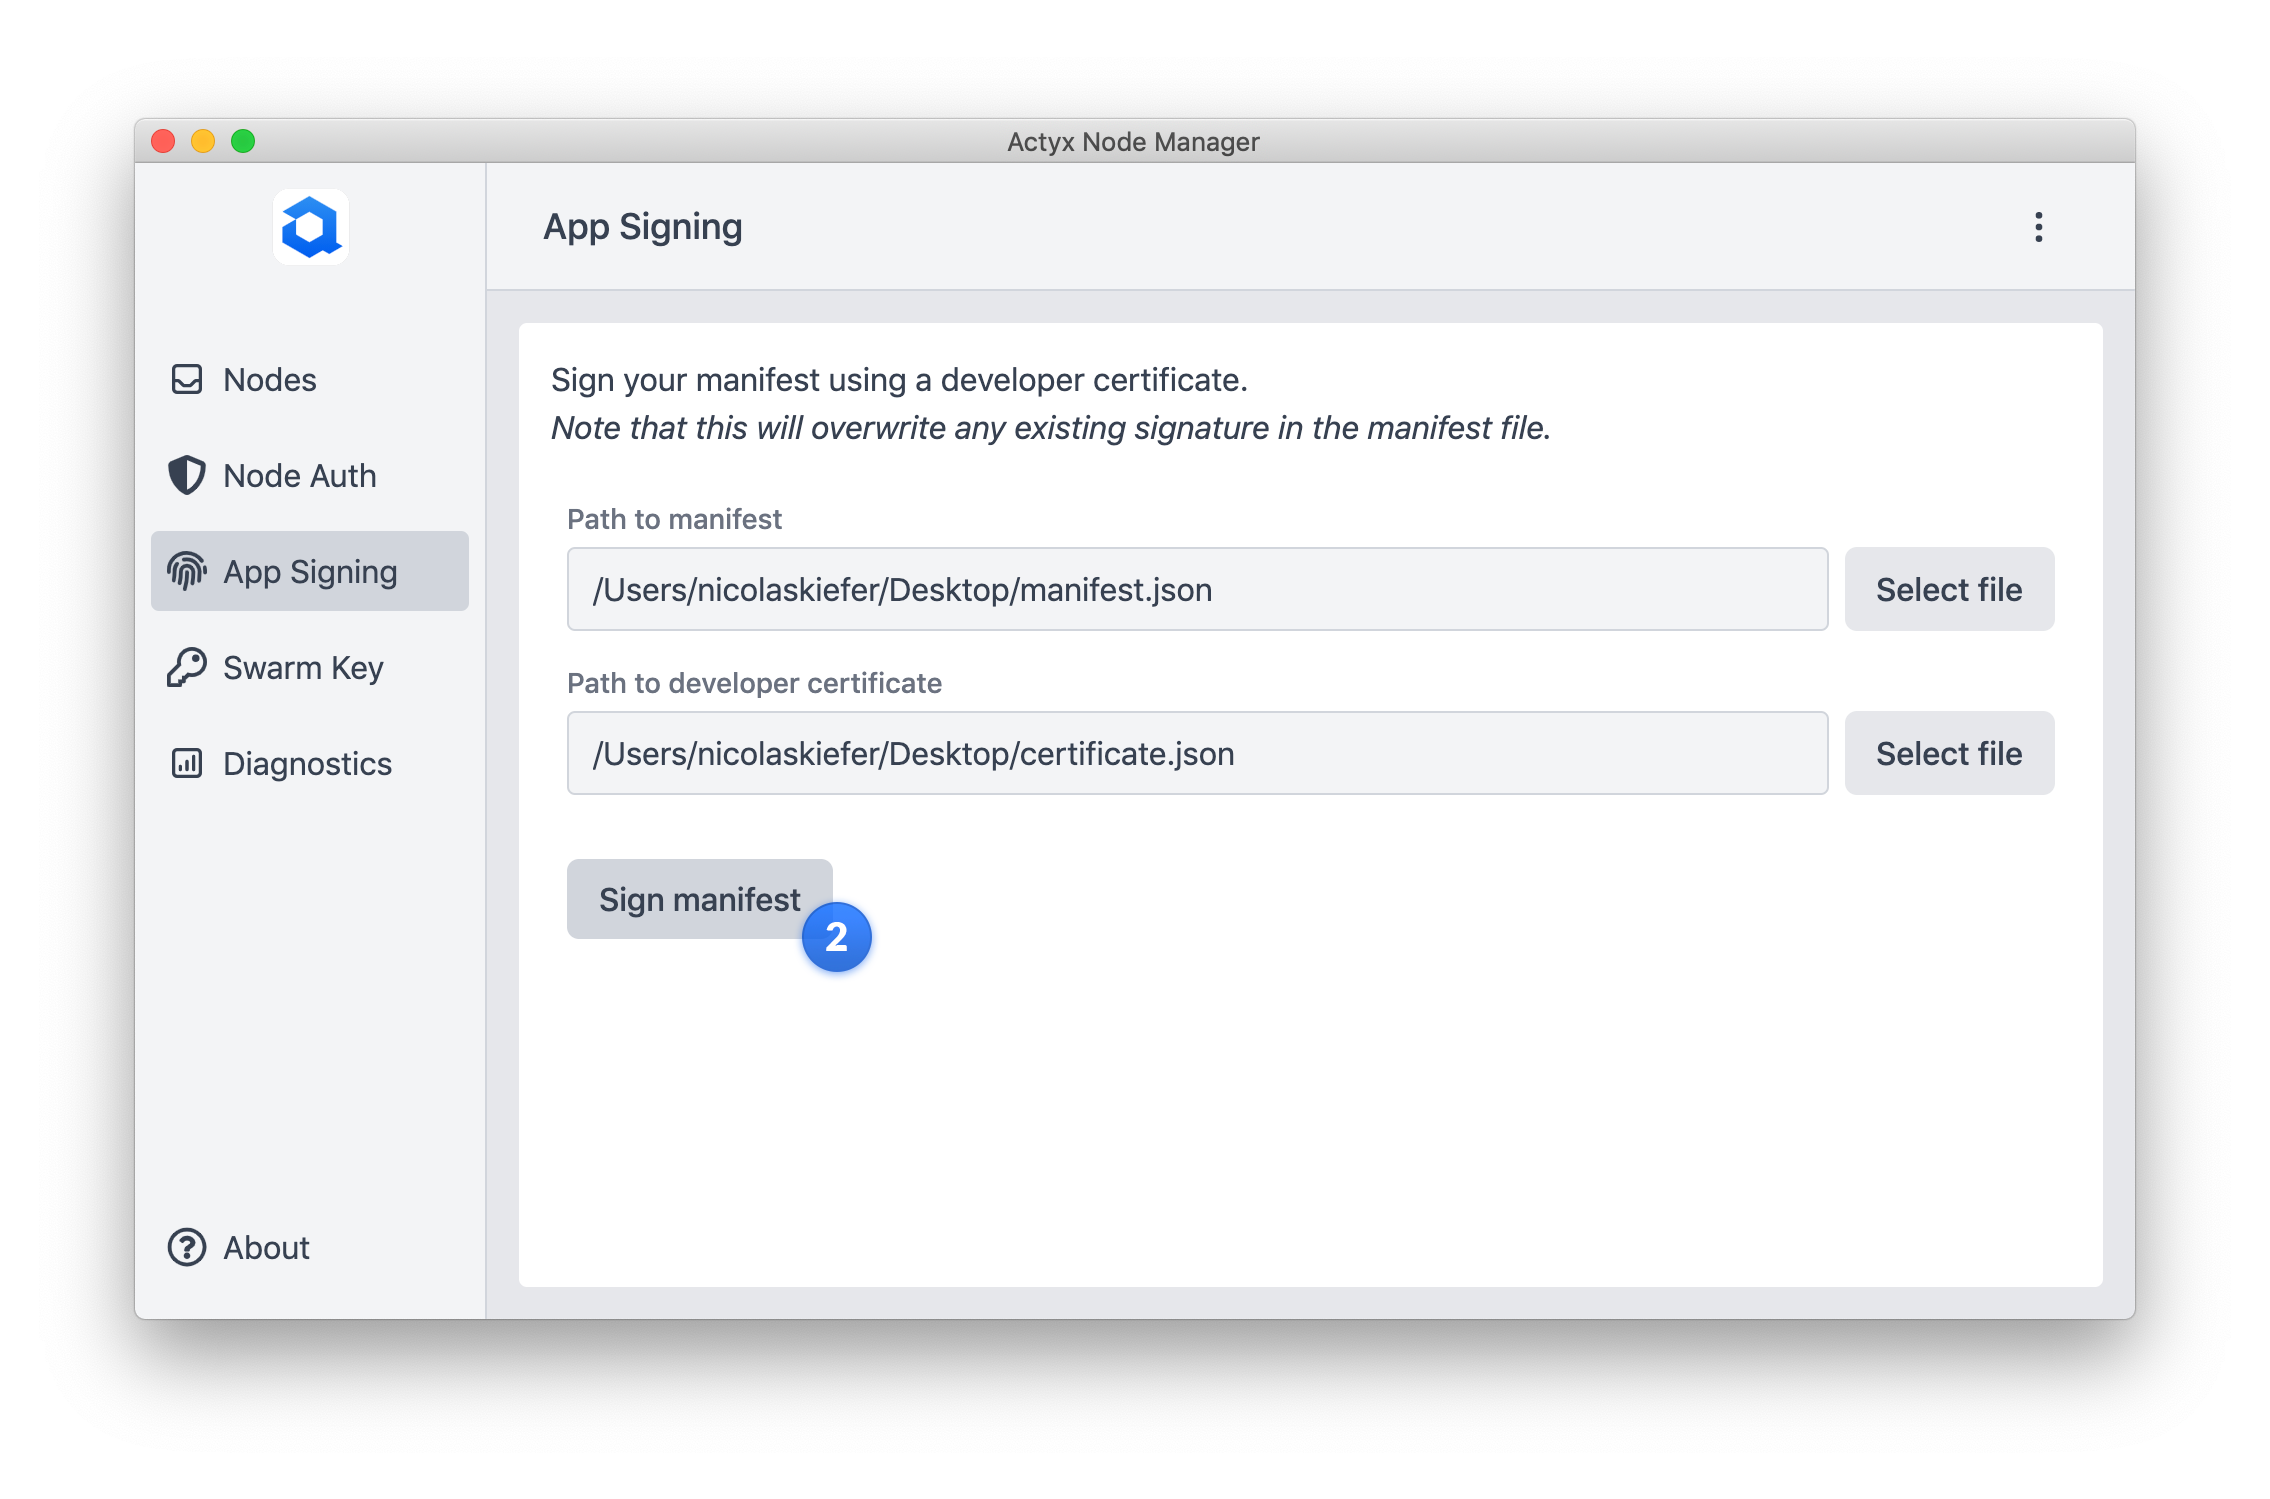
Signing your manifest updates the existing manifest file. If it already contained a signature, signing the manifest again overrides the existing signature. Note that the app ID in the manifest must use the namespace you used to obtain your developer certificate.
Creating a swarm key
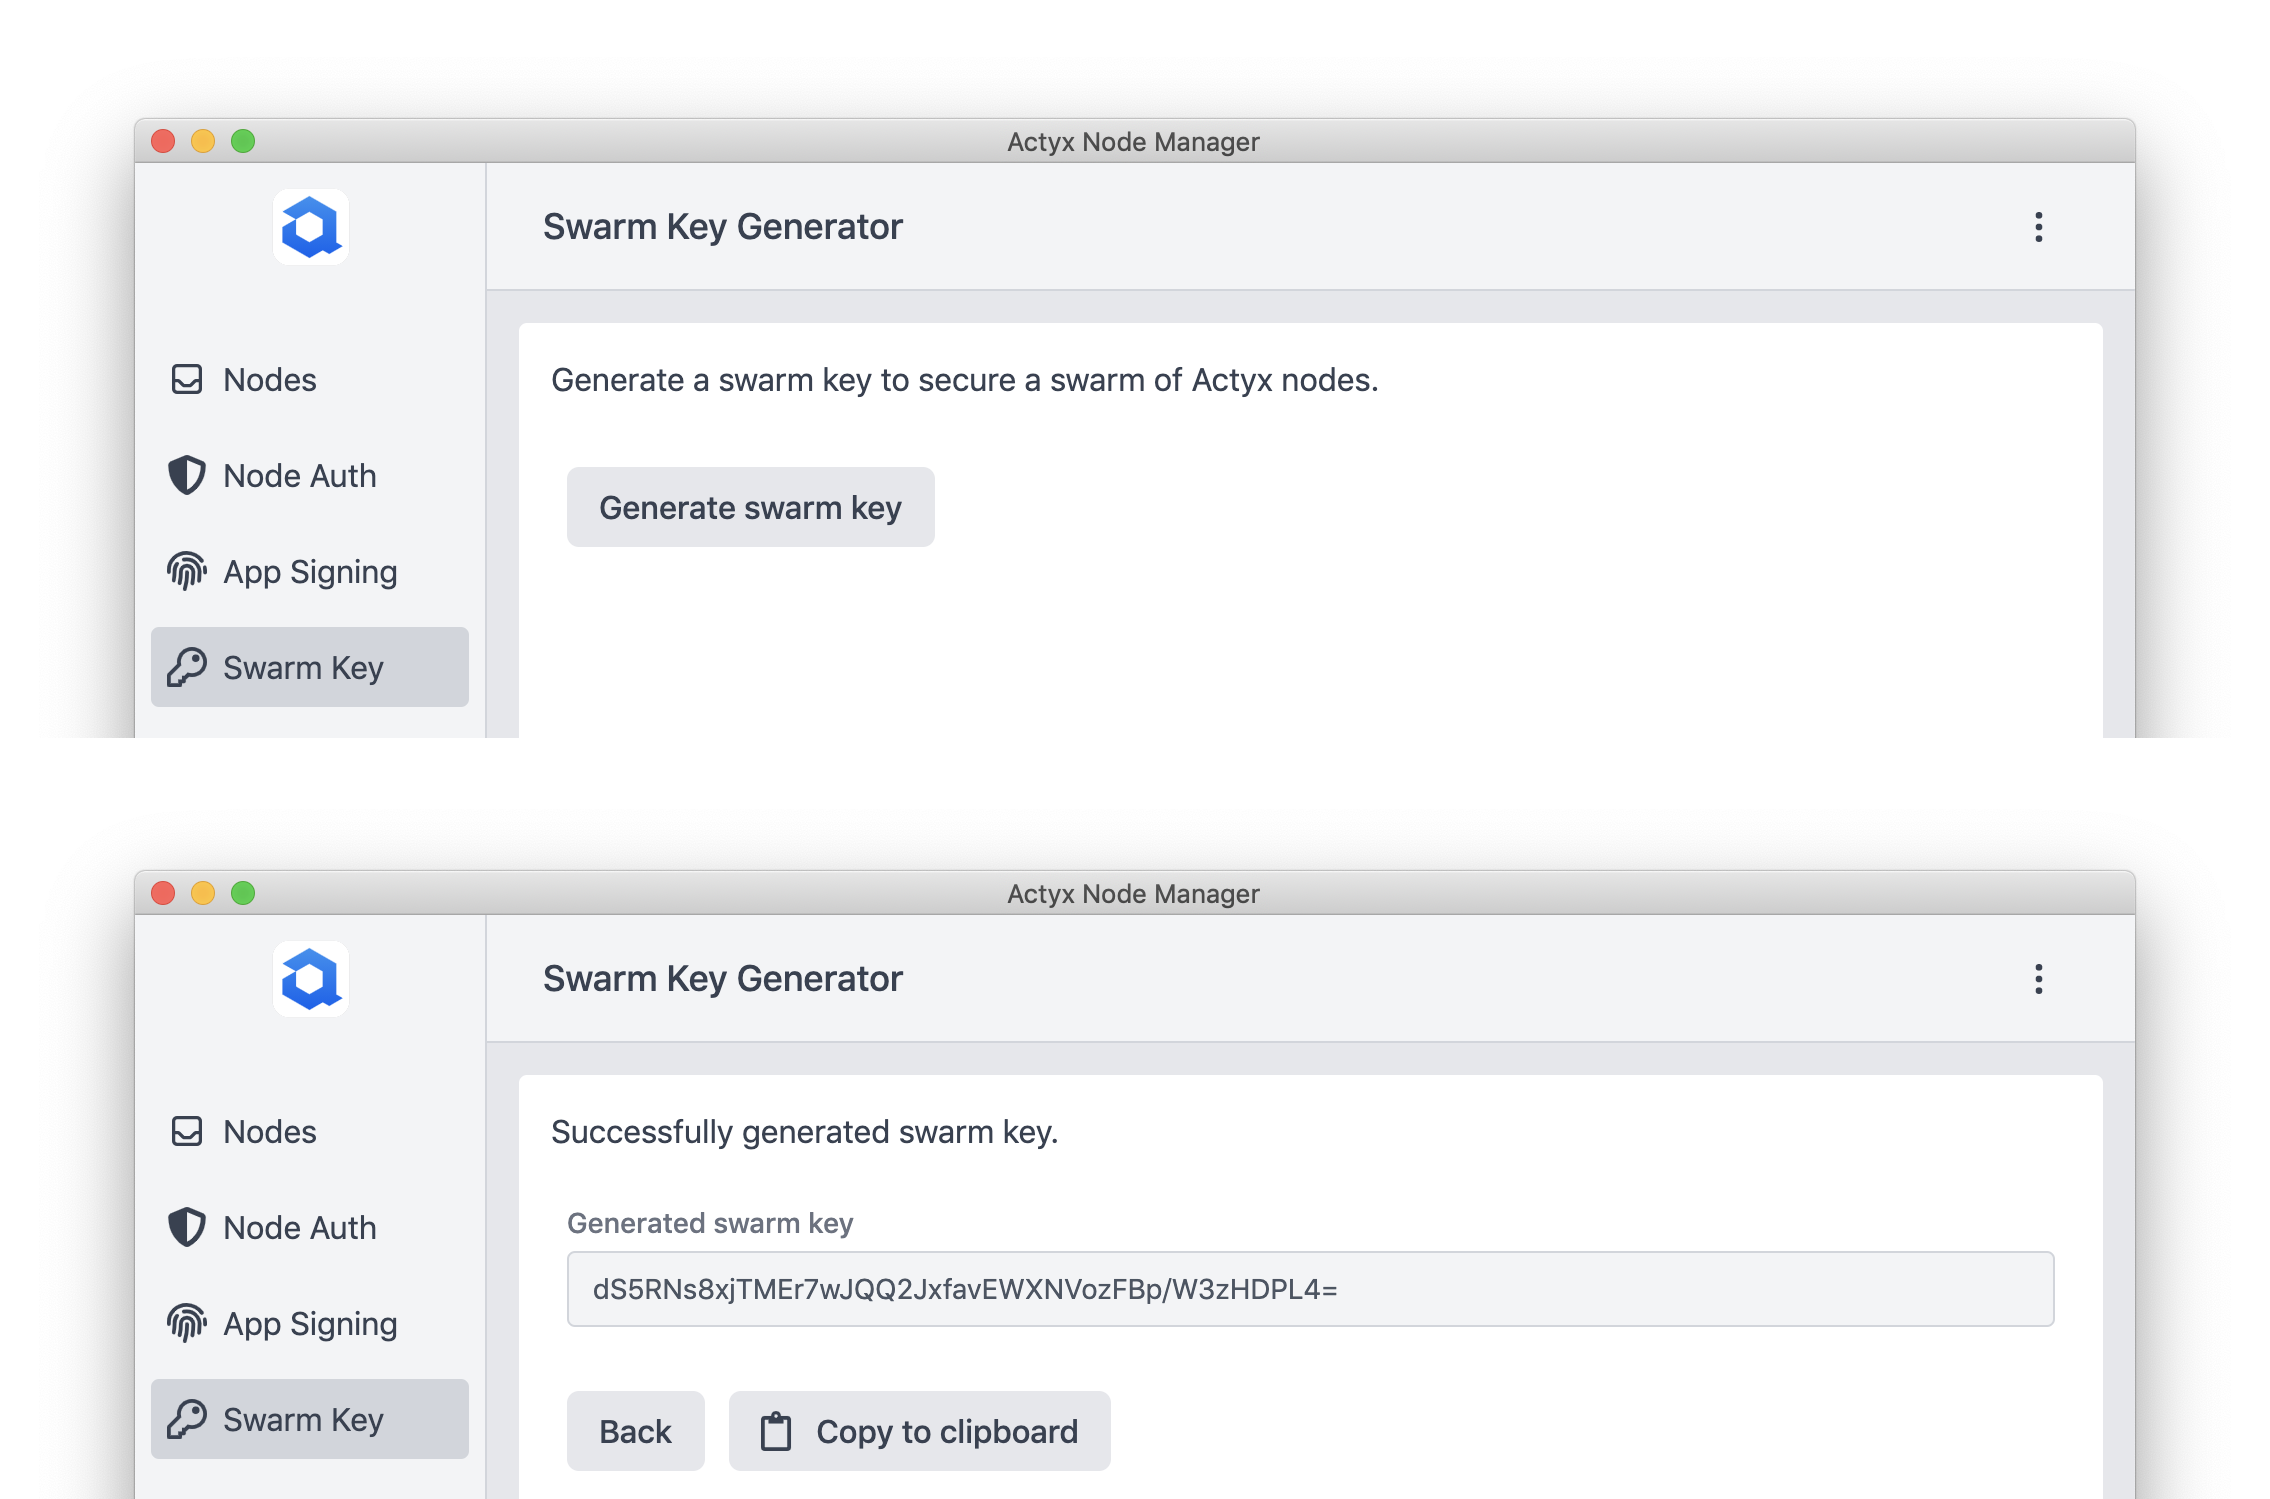
Actyx Node Manager lets you create swarm keys. For more information on what a swarm is and what you need the swarm key for, please refer to our how-to guide.
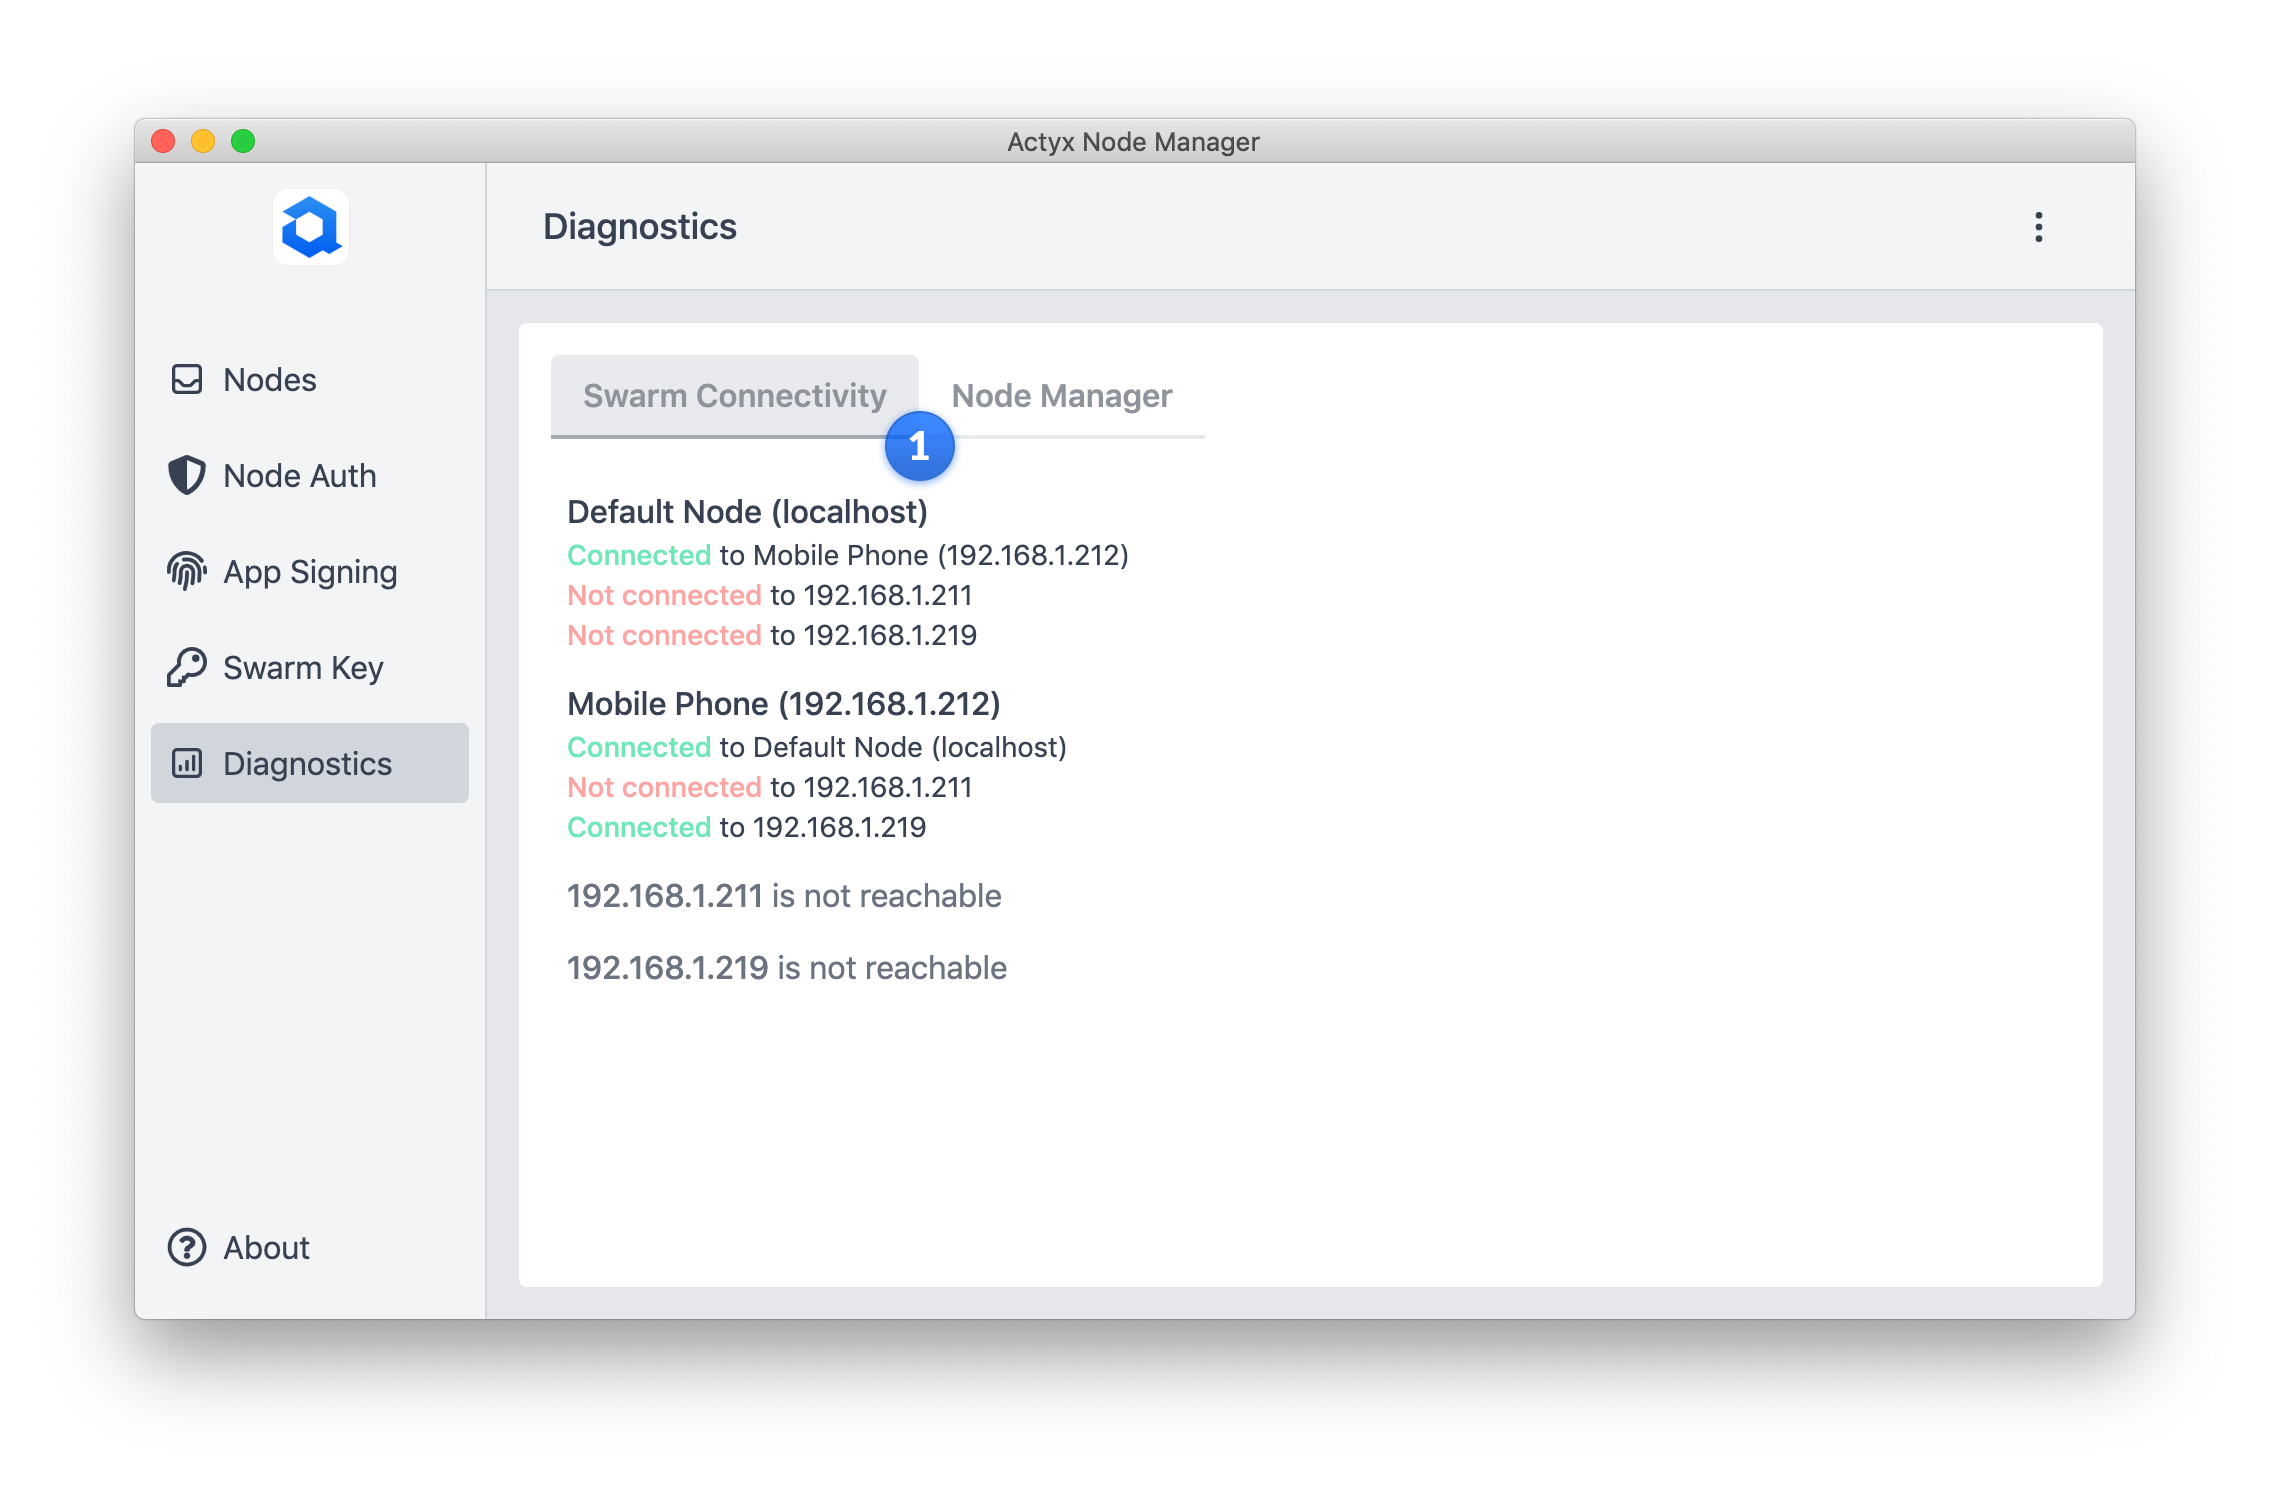
Diagnostics
The Diagnostics view gives insights into the swarm connectivity and provides additional data such as the app state, or the node settings schema.
1 Swarm Connectivity
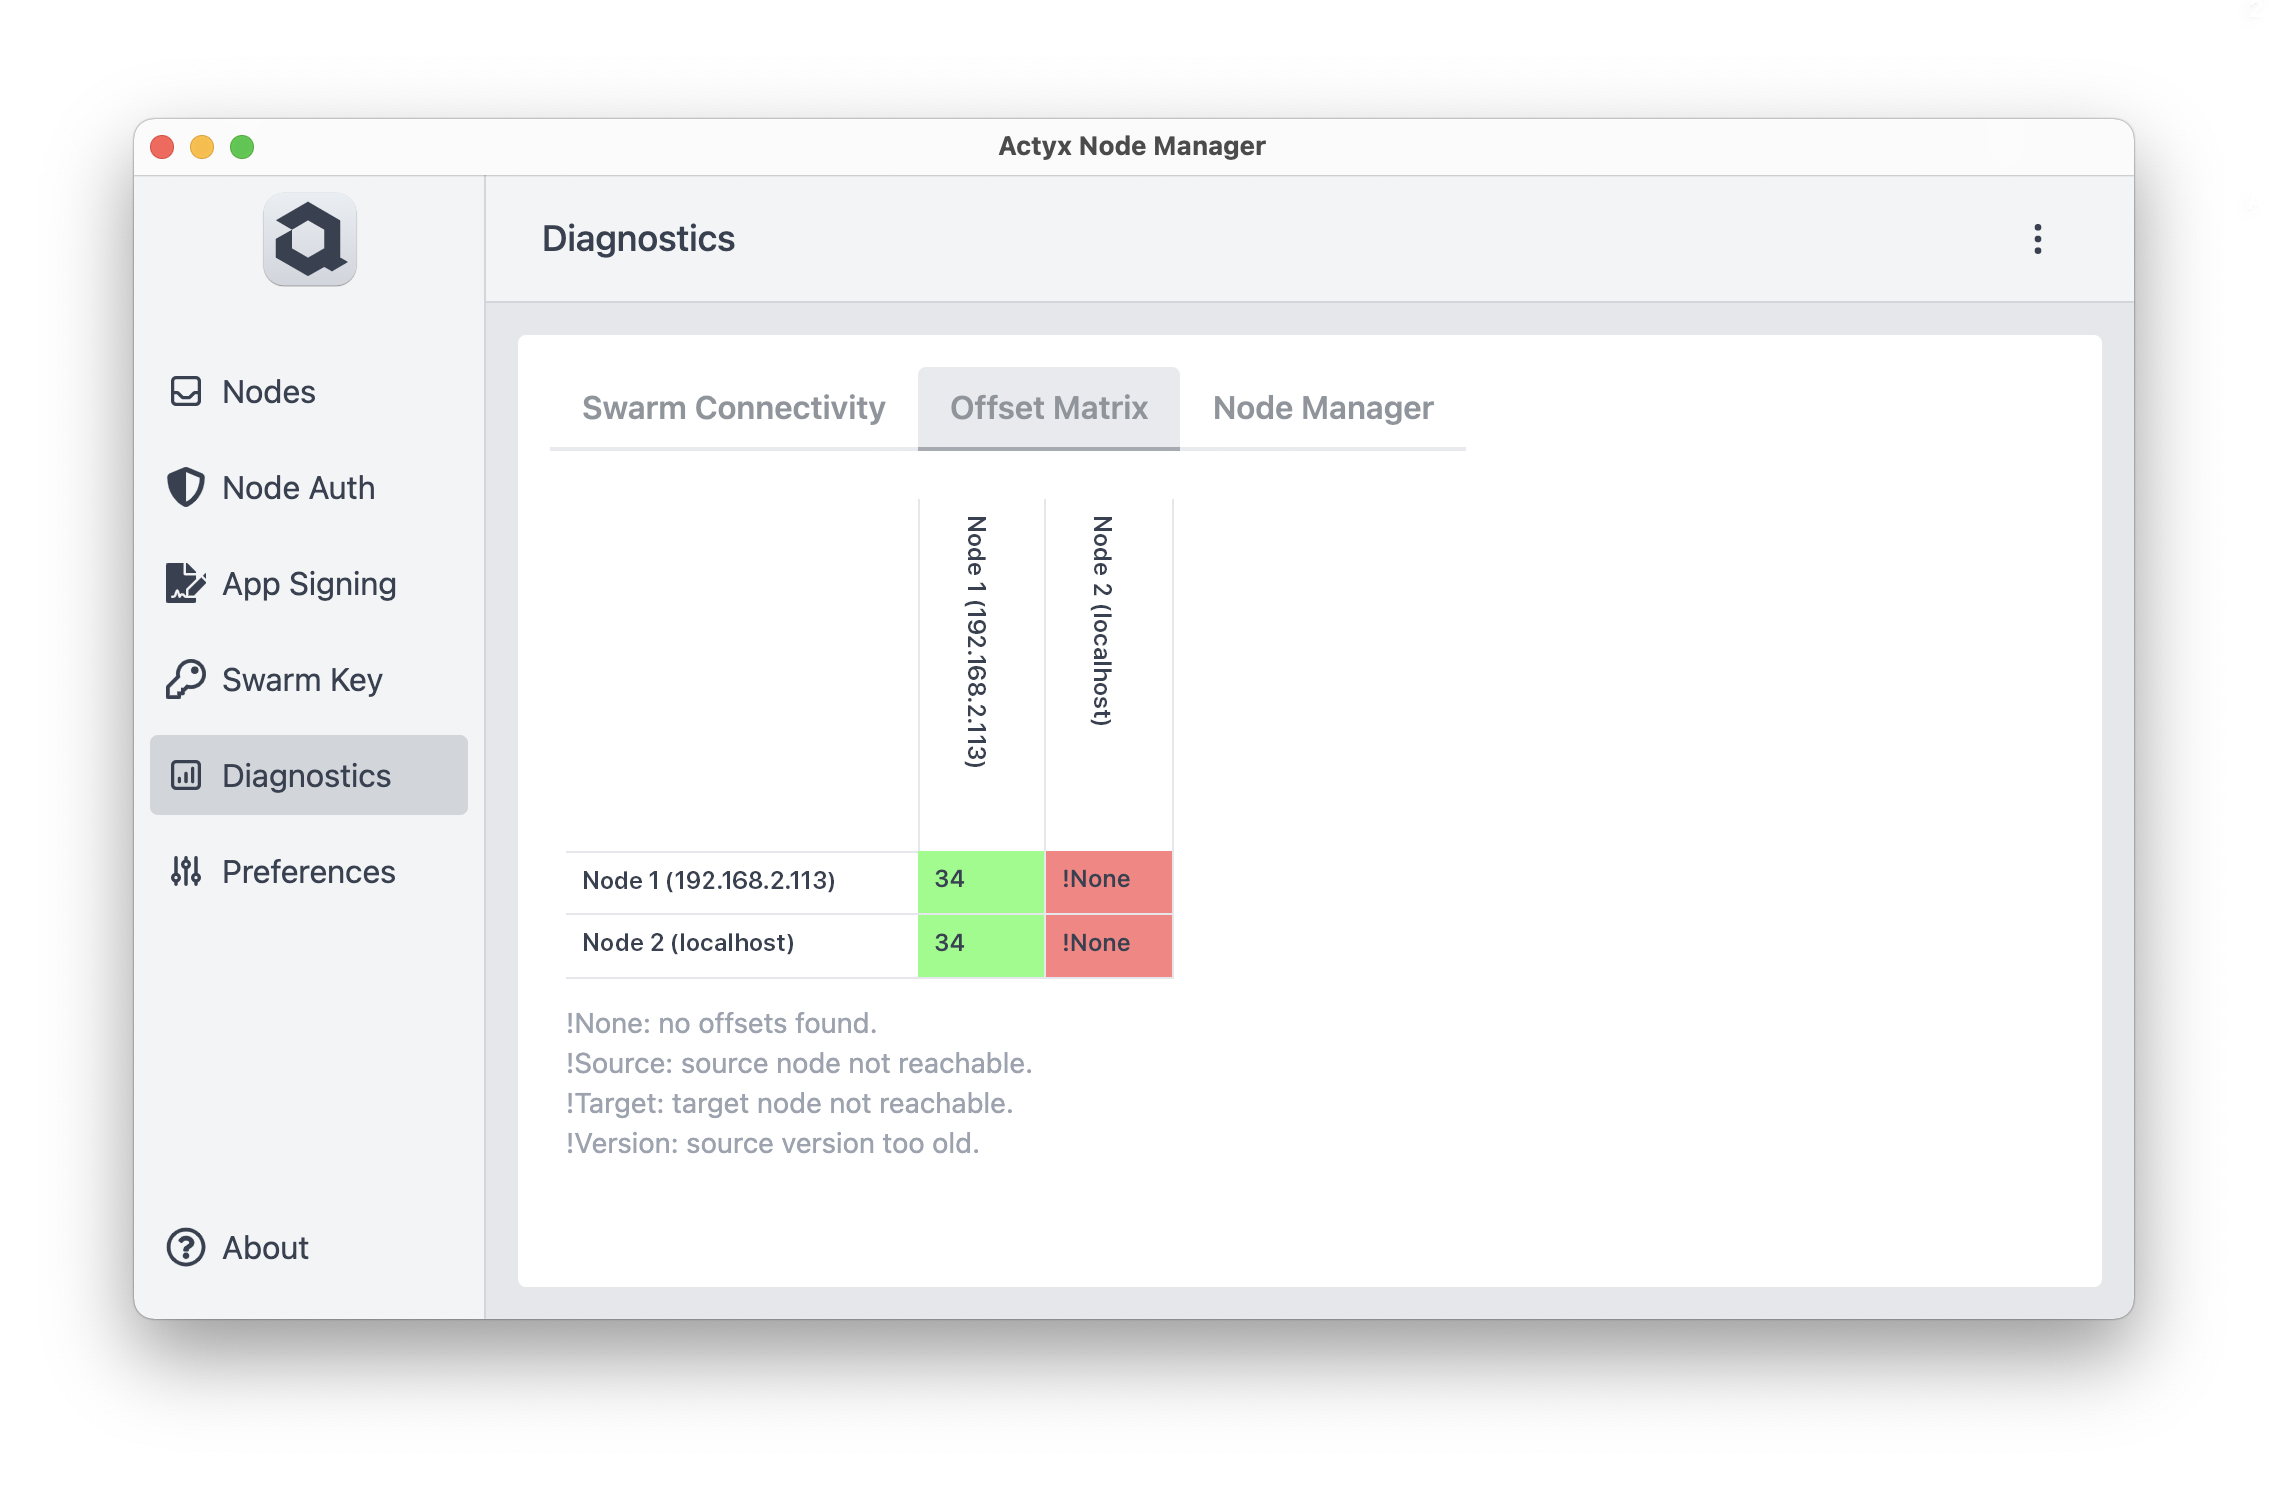
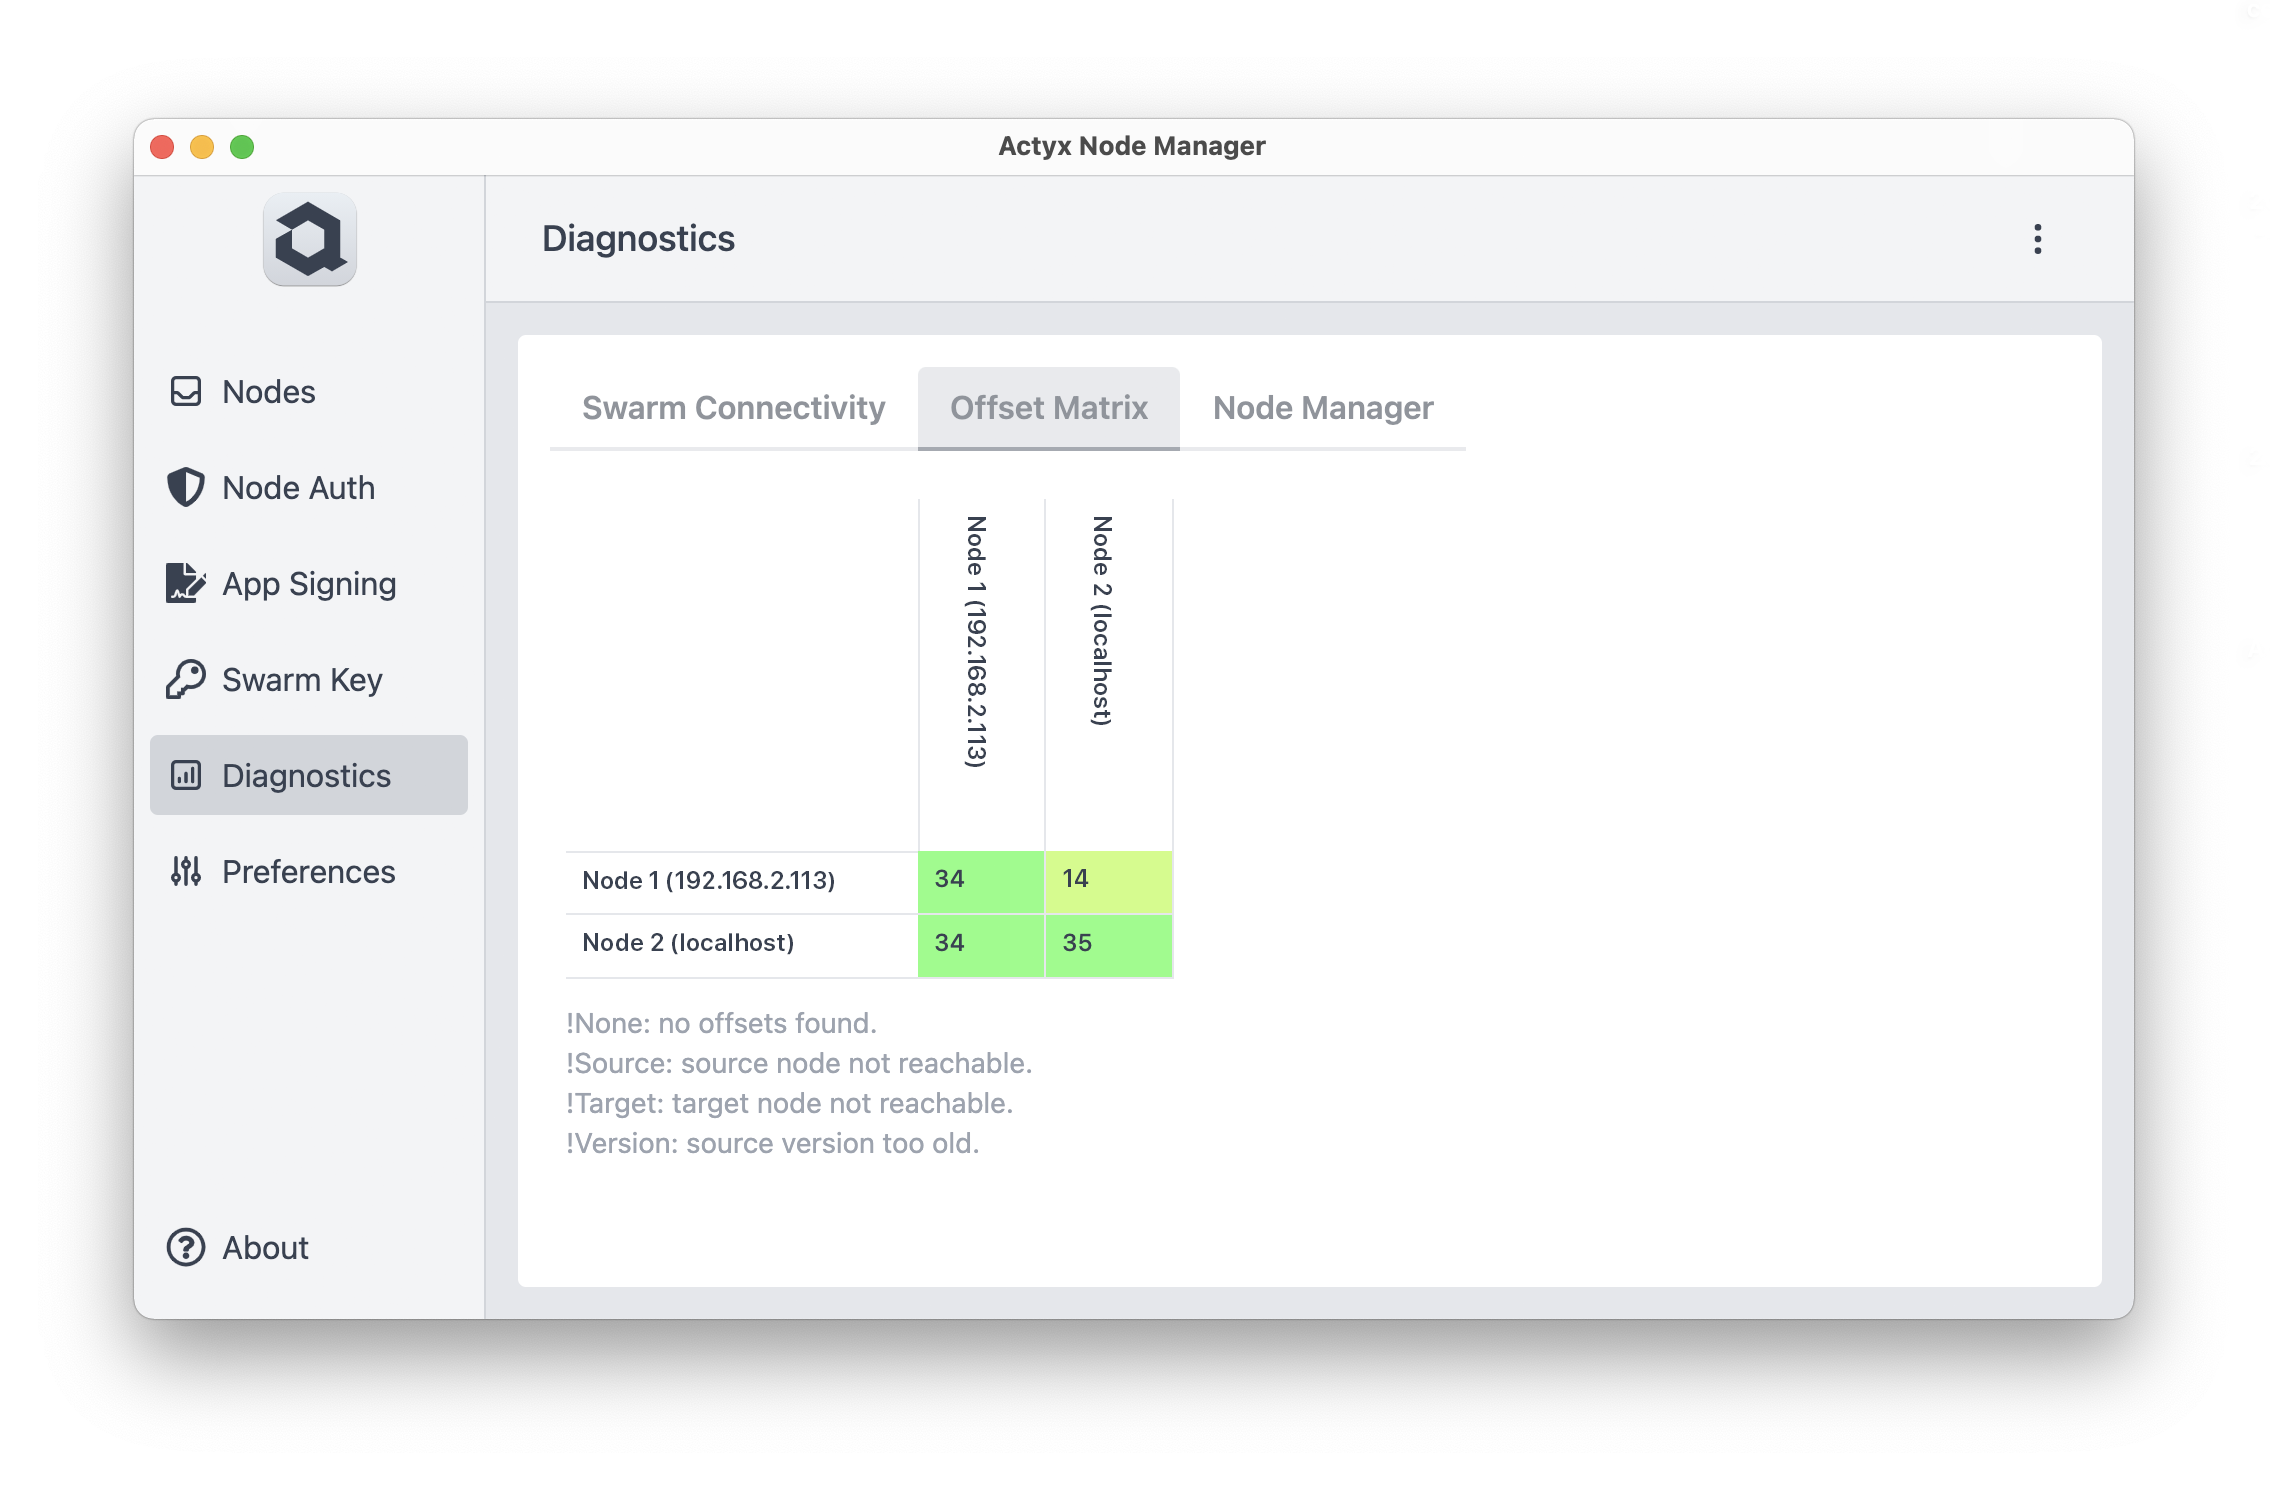
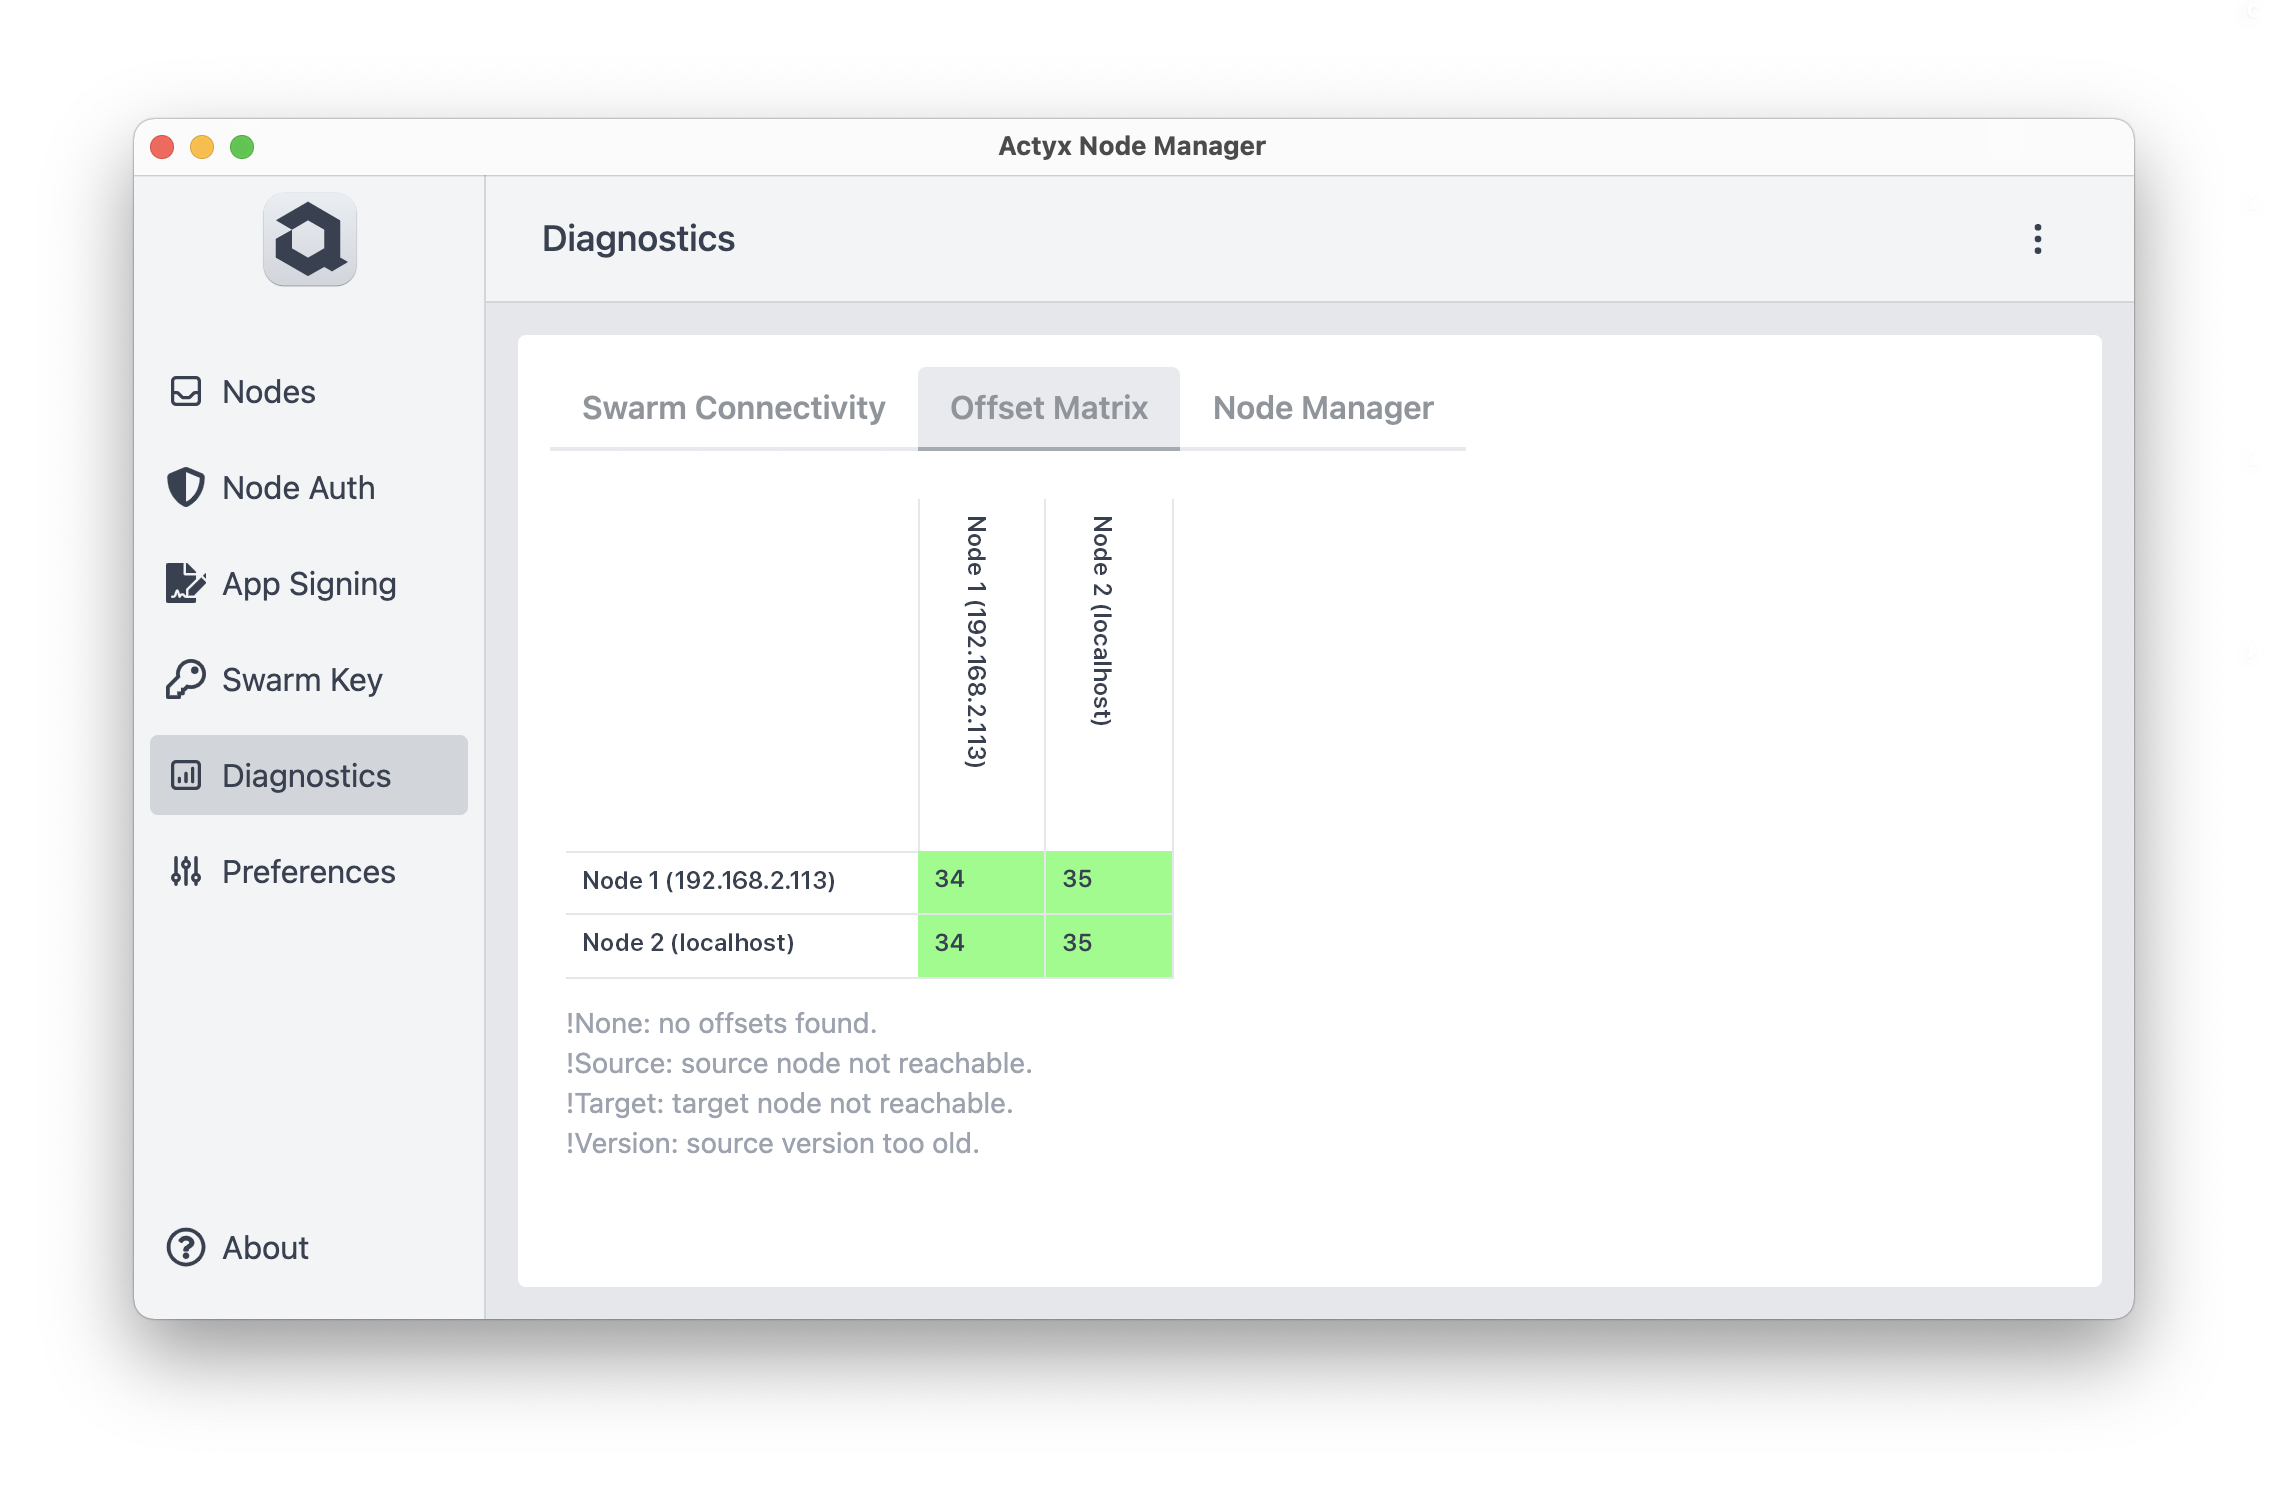
2 Offset Matrix
The Offset Matrix tab shows a matrix of all nodes connected to the Node Manager. Each row of the matrix shows how many events a node holds from all other connected nodes. The color of the cells reflects the level of synchronization. A red cell would imply a large number of missing events, whereas a green cell means the node is completely up to date.
Examples
Consider three examples of an offset matrix and the interpretation thereof.
- Example 1
- Example 2
- Example 3
3 Node Manager
